So with all those things seen to, it is time to revisit the seats. These have been coming together for a long time, since a set of seat frames was scrounged from the collection of old ones at Tempe Museum, destined for the scrap heap. They had their legs inset 6 inches from the aisle, being from post war deckers, so all legs were cut off with the angle grinder, and welded back on flush with the aisle end. Then all the seat tops, in their rusty chrome, were cut off using a jig to ensure each cut was identical. Having been in the weather for some time they were pretty rough looking, but a friend who just happens to own a sand blasting and powder coating business offered with great generosity to refinish them. That done, they just sat, immaculate in their glossy brown, stacked up in the workshop for a couple of years.
New seat tops were made this year, and sent to the plater along with all the other hundred or so bright parts. Tempe yielded a set of seat cushions, all about 50 years old so the Dunlopillo had turned to black crumbs, and a couple of good seat backs to act as a pattern for making new ones.
So all was on hand: frames, tops, cushions and backs, and the great moment arrived: virtually the last stage of the whole restoration.
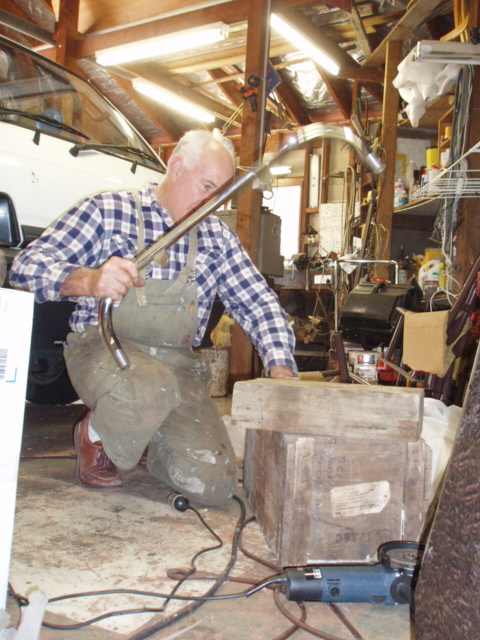
SLEEVES HAVE BEEN TURNED TO DIAMETER (FROM OLD MALLEYS WHIRLPOOL SPIN TUBES) SO THAT THEY ARE A PRESS FIT IN BOTH THE NEW SEAT TOP AND THE REFURBISHED SEAT FRAME. THEY ARE BEING KNOCKED INTO THE SEAT TOP BY WHACKING ONTO A SOLID BLOCK OF WOOD.
THE TOPS THEMSELVES ARE ALL NEW, MADE OF 1.25 INCH STEEL TUBE, BENT TO SHAPE BY A SPECIALIST TUBE BENDER. STEEL LUGS, CUT BY LASER AT QUITE MODEST COST, I THEN WELDED ONTO EACH TOP, BEFORE SENDING IT FOR POLISHING AND PLATING. This process is easier and cheaper than trying to replate just the top of the old seat frame. And the old seat tops were quite badly pitted from salt left by sweaty palms over decades, so that polishing them was well nigh impossible. I tried once.
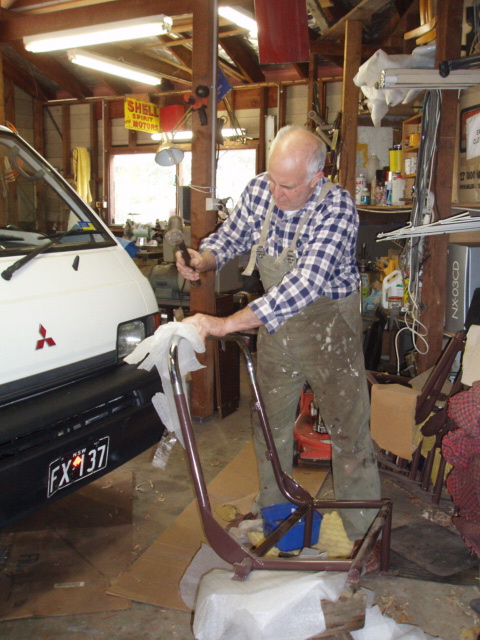
USING A LEATHER FACED HAMMER, CUSHIONED WITH SOME OF THE WRAPPING PROVIDED FOR THE NEWLY-PLATED SEAT TOPS BY SWIFT ELECTROPLATERS, TO PRESS THE SLEEVES INTO THE SEAT FRAME ON EACH SIDE. The seat frames were sand blasted and powder coated by my friend Phil Dixon in Parkes.
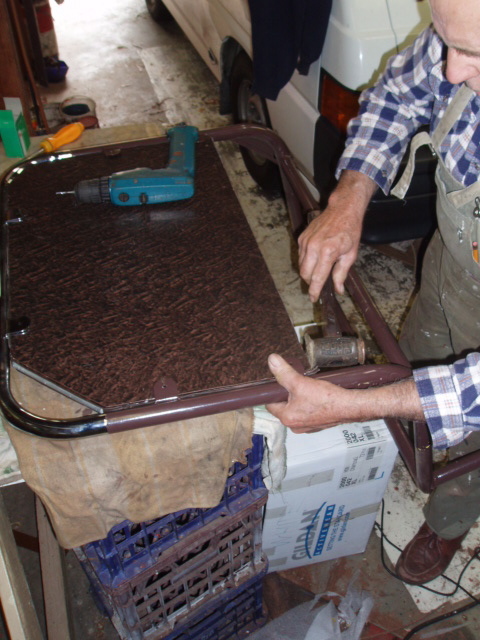
USING THE LEATHER HAMMER, THE SEAT BACK IS TAPPED SNUGLY INTO POSITION IN THE FRAME. The seat backs are mostly new, with some exceptions, made from 2"x1" wood, covered with Masonite, Scumbled to give the leather-look paint finish, then upholstered. The shiny bit along the corner is 1/2" crescent section aluminium, drilled and nailed onto the seat back to prevent scuffing of the upholstery edge by hands hastily grabbing the seat as the bus lurches.

USING THE DRILL AS A SCREWDRIVER, NEW SCREWS ARE USED TO SECURE THE SEAT BACK AFTER DRILLING CLEARANCE HOLES THROUGH THE MASONITE INTO THE WOOD FRAME. AFTER A VAGUE ALLOWANCE FOR THICKNESS OF UPHOLSTERY, AND THE UNCERTAIN FINAL SIZE AND SHAPE OF FRAME AFTER ALL IT HAS BEEN THROUGH, THE NEAT FIT OF THE SEAT BACK INTO ITS FRAME IS A PLEASANT SURPRISE! The process will consume nearly 200 screws.
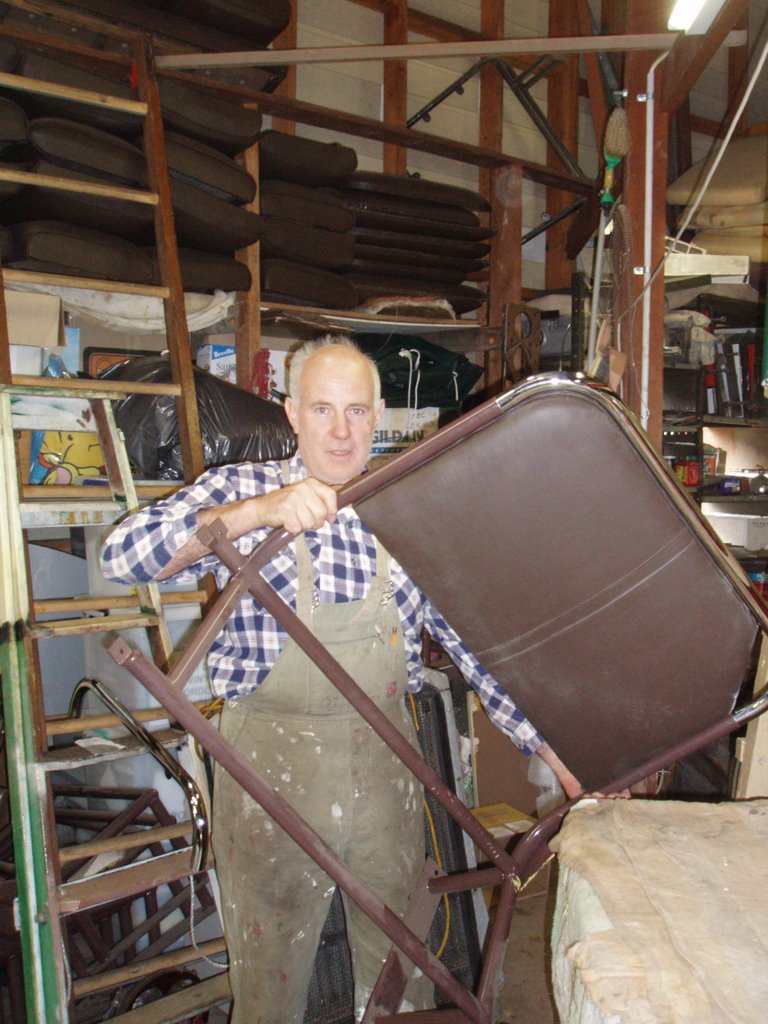
THE FIRST COMPLETED SEAT AWAITS ONLY BOLTING TO THE FLOOR AND WALL, AND A SEAT CUSHION WHICH JUST DROPS INTO POSITION.
No comments:
Post a Comment