First step was to lay the malthoid flooring to the bottom deck floor and rear platform. These had been left bare so that paint spots could fall from ceiling and framing without causing a mess.
Then all the glass panes could go in: twenty windows along the sides top and bottom, made up of one fixed pane and one sliding pane each, the drop windows at front upstairs and behind the engine bay downstairs, fixed and sliding panes beside and behind the driver, and the fixed pane at the back of the lower saloon.
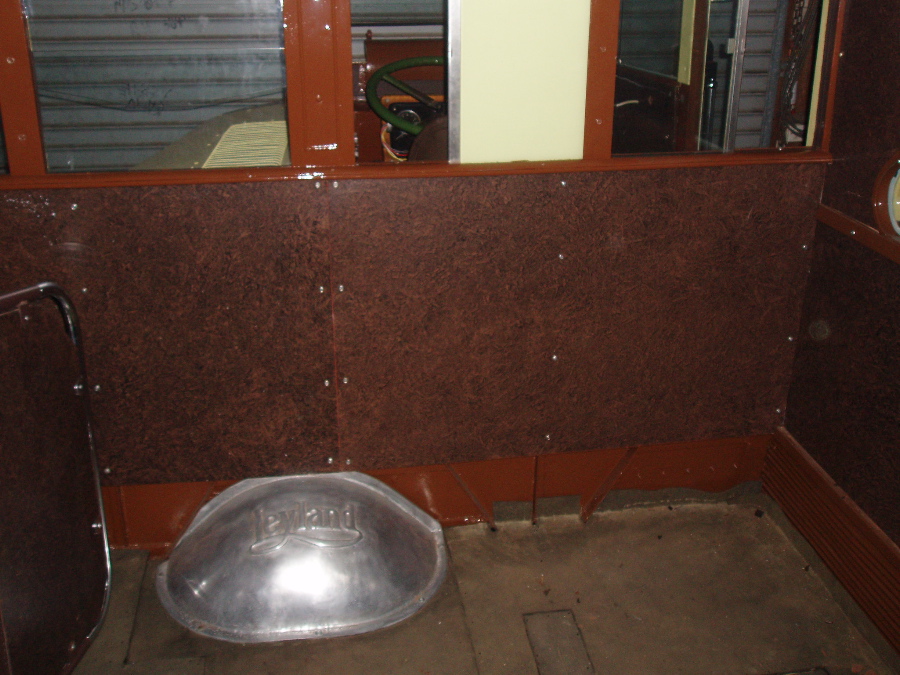
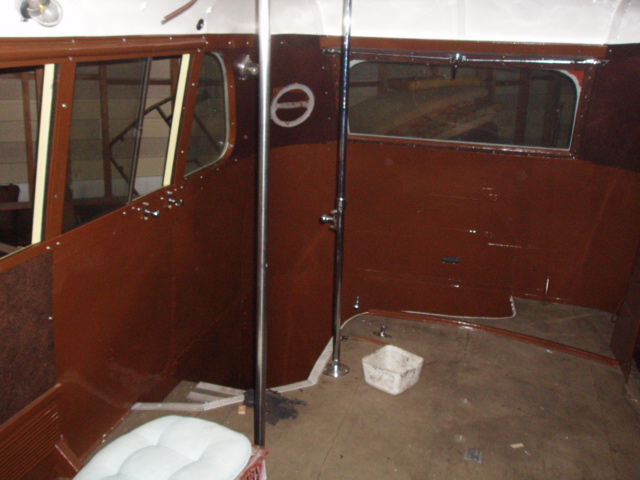
MALTHOID ON THE FLOOR DOWNSTAIRS AND GLASS IN PLACE IN THE FRONT BULKHEAD. Some of the 2,000-odd screws are visible. Regular visits to Bomond Trading, Brookvale, have had to happen as I surprised myself by running out of the required screws: 8 gauge and 10-gauge, pan head and countersunk head, but above all, with slotted heads. Phillips screws just weren't around in 1937, and now it's getting hard to find slotted screws because everyone wants the easier Phillips head type, which don't let your screwdriver slip off and go skidding across your nice new paintwork.
I was moved to count all the panes: there are 69 altogether, including ten in the driver's cab alone. Rather surprisingly I found the ones behind the driver, which were missing 20 years ago (see Archive: First Find the Bus to Restore, June 2006) and of which I had found one to use as a pattern for cutting the three new ones which were needed, were all about 15mm too tall! My pattern had been from a post-war decker; pre-war windows are smaller......
More than one visit to Tempe, with camera, was needed to explore the relatively untouched, but unrestored, Leyland TD5 there, no. 1438. Thus was it possible to find just how certain mystery items slotted together, and to identify pieces which were just missing from my stock of bits.
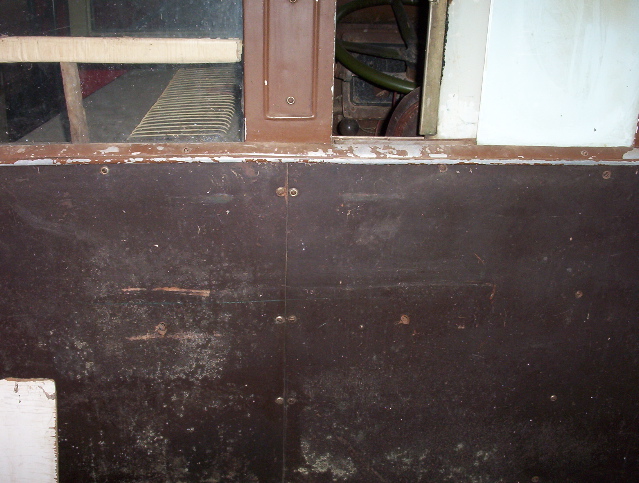
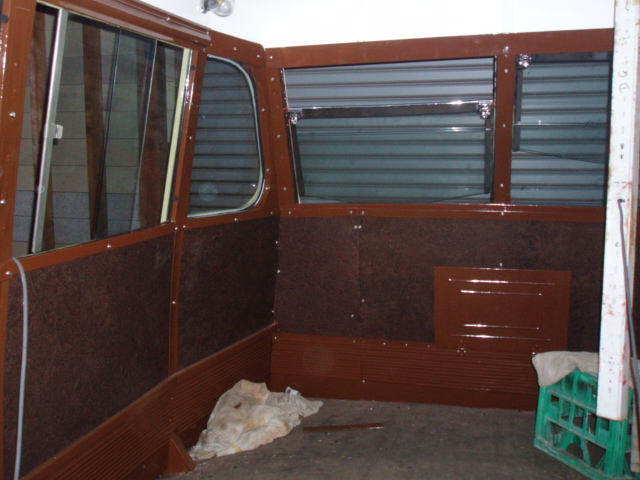
A SHOT TAKEN INSIDE m/o 1438, THE UNRESTORED 1938 LEYLAND DECKER AT THE MUSEUM. THE SLIDING PANES BEHIND THE DRIVER ARE AT RIGHT, THE DROP WINDOWS BEHIND THE ENGINE AT LEFT. THERE IS NO COVER STRIP OVER THE JOIN BETWEEN TWO SHEETS OF MASONITE ACROSS THE FRONT WALL! THIS SEEMS TO HAVE BEEN STANDARD PRACTICE.
Even the sliding panes behind the driver are a moot point: there is a view that the far right hand pair were not even fitted in these buses as built. And when they were fitted it was as a pair: post war buses have one large pane which slides to the left and allows the conductor to hang his head and shoulders into the cab to discuss the events of the day. Now that 1379's cab has its right hand side panes fitted, you can hardly get your head through the aperture, let alone shoulders.
Click on a photo to enlarge it.
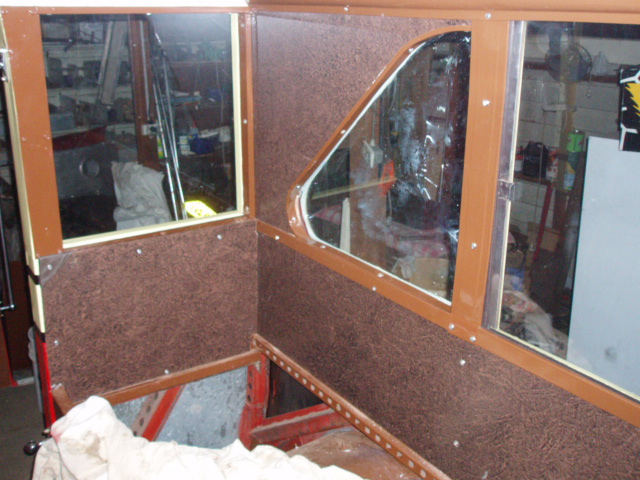
THE CHANNEL SECTION TRIM AROUND THE TRIANGLE WINDOW IS VISIBLE, AND AN ABSOLUTE DOG TO FIT.. It has to fit snugly into the scumbled Masonite hardboard panel, be spaced away from the hidden steel framing with wood blocks of varying thicknesses so the screws don't crush the soft aluminium channel, and hopefully it hides the edges of the glass and the putty. In the event, the putty shows from the inside on most of them. Disappointing and hard to fix. After eight such trims (four on each deck) I was getting better at these and then there were no more to do.....
And so a pattern began to emerge: decide on the order of assembly, then learn how to go about the process of fitting of a particular group of parts. No sooner were they all in, than it was time to move on to a new group of parts and learn how they should go in.

THERE IS NO SAYING THAT THESE PHOTOS SHOW THE ORIGINAL CONDITION OF m/o1438; IT HAS BEEN OVERHAULED AT LEAST THREE TIMES IN THE GOVERNMENT'S WORKSHOPS, BUT IT'S THE NEAREST GUIDE AVAILABLE TO THE LIKELY APPEARANCE OF A 1937/38 DOUBLE DECKER'S INTERIOR. THIS SHOWS THE COVER STRIP OVER THE JOIN BETWEEN TWO SHEETS OF MASONITE, THE CAPPING ALONG THE TOP OF THE MASONITE, THE PILLAR CAP AND ITS LITTLE INSERT ACTING AS THE COVER OVER THE JOIN IN THE CAPPING STRIP.
The interior trims consist of: masonite lining, finished with a scumbled paint effect to simulate leatherette; metal trims, or cappings, along the top of all these panels, which hook over the raised inner edges of the waist rail cappings where the window panes sit; channel-section curved trims fitting around the triangular windows at each end of top and bottom decks; steel pillar caps which incorporate little rubber buffers to stop the sliding panes hitting them; various valances mostly around the tops of windows; cover strips over joins in masonite; the massive longitudinal mouldings acting as advertsement holders and wiring conduits; and large vinyl-covered curved liners inside the roof domes at the rear upstairs, made of heavy cardboard.
MOST OF THESE CAN BE SEEN IN THIS VIEW UPSTAIRS:
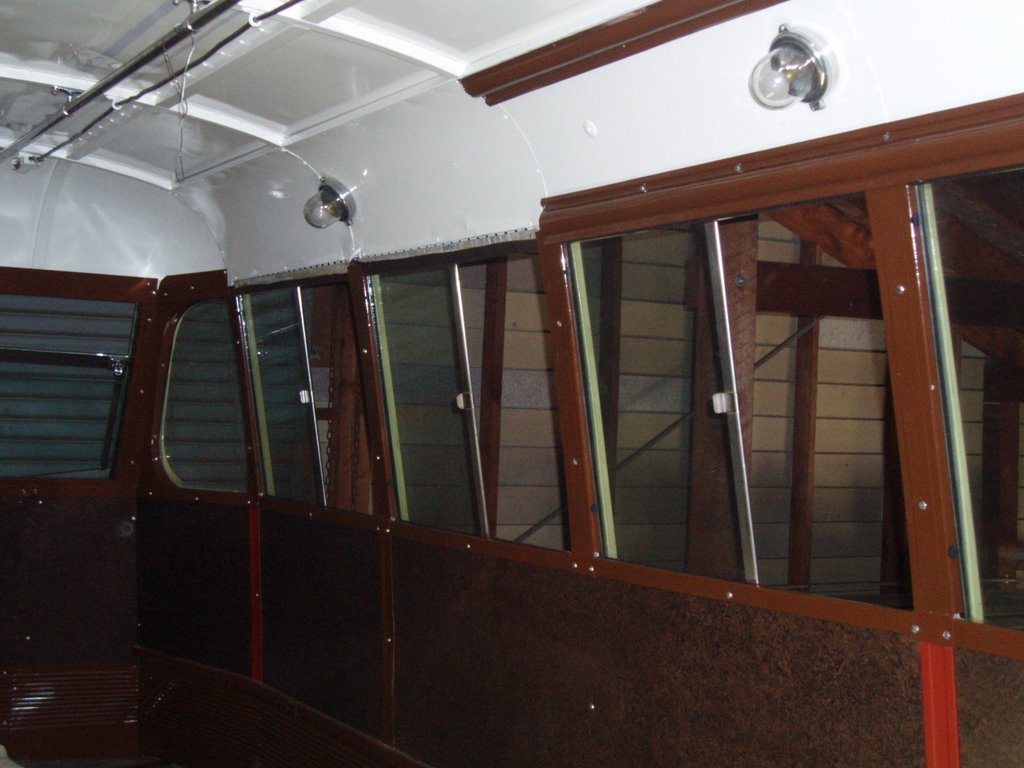
THE TOP DECK LOOKING FORWARD. The steel mouldings which act as racks for advertisement boards, with the lower one also concealing wiring to the interior lights, are going in above the windows.
The metal cappping trims along the top of the interior lining are new, as is the lining, and in most cases the sill into which they are attached is new too, so it was a matter of learning how best to find the position for the new screw hole and then getting to work on them all, bottom deck then top deck.
I found a material called Customwood which was virtually identical to the original and had it covered by an upholsterer, who put in the necessary piped edge where they meet the rear window upstairs. The stuff bends easily and is really more like coardboard than wood.

THE OFFSIDE TOP DECK. The vinyl covered Customwood lining carries a light and the frame to hold the convex mirror which allows the conductor a good view of goings-on on the top deck, from his position on the back platform. Along the top edge of the vinyl are two cappings: why not one piece? I'm not sure. The front one is steel, the rear is some more Customwood covered with vinyl, which leads into the metal valance over the emergency window.
THE DISTANT VIEW OF THE SAME CORNER SHOWS THE CAST ALUMINIUM STAIR TREADS IN PLACE, AND THE TWO STANCHIONS AT THE HEAD OF THE STAIRS. THE ONE ON THE RIGHT WILL CARRY A CURVED HANDRAIL RISING FROM THE BOTTOM DECK. The scumbled masonite gives way to the steel lining of the stair well. The vinyl covered Customwood trims to each side of the emergency exit window have piped edges where they meet the window. These panels were made of steel in post-war deckers.
ON THE TOP DECK LOOKING FORWARD. THE VALANCES ABOVE THE TRIANGLE PANE AND THE FRONT DROP WINDOWS ARE IN. THE LITTLE BLACK DOTS IN THE EDGE OF THE PILLAR CAP ARE THE RUBBER BUFFERS. David Wilson once again was able to provide the essential, genuine, item: a set of about 40 new rubbers to fit to the pillar caps.
ON THE BOTTOM DECK, RIGHT HAND REAR. AT THE OFFSIDE BOTTOM DECK, BAY 7, OR OSB7 IN BODYBUILDER'S SHORTHAND.
THE FLOOR AROUND THE BASE OF THE REAR WHEEL ARCH HAS MALTHOID LAID, AND THE MASONITE LINING IS IN, WITH ITS CAPPING STRIPS. THE EMBOSSED CAP ON THE VERTICAL PILLAR HAS A LITTLE EXTENSION IN ITS BASE TO ACT AS A COVER FOR THE JOINT IN THE CAPPING STRIPS.
2 comments:
[url=http://www.ile-maurice.com/forum/members/wetter-vorhersage.html][b]wetter aktuell[/b][/url]
[url=http://www.ile-maurice.com/forum/members/wetter-vorhersage.html][b]das wetter[b][/url]
Wettervorhersage is a set of all the phenomena occurring in a given atmosphere at a given time. Most weather phenomena occur in the troposphere, just below the stratosphere. weather conditions refers, generally, to day-to-day temperature and precipitation activity, whereas climate is the term for the average atmospheric conditions over longer periods of time. When used without qualification, "weather" is understood to be the weather of Earth.
http://www.ile-maurice.com/forum/members/wetter-vorhersage.html
Post a Comment