Sunday, September 17, 2006

PAINTING BEGINS!

A massive gap in the smooth flow of restoration was ended on Monday September 11th 2006.
Rob Gregor, a professional bus painter with the Port Botany depot of the State Transit Authority of NSW, took some long service leave and began work.
Thanks to the good offices of the Sydney Tram Museum at Loftus, the work is being carried out in an annexe to their workshops, where there is space to erect scaffolds for access to the high up panels, and a well-lit area. Unfortunately it was soon found to be a very dusty area, and the first items to receive paint, some interior pillar covers, showed fearful dust contamination after sitting to dry. So with my trusty aide Craig Parkinson, we moved the bus outside, washed it down and then hosed out the interior of the annexe, which exorcised the demon dust. Next step was to acquire some undercoat to mix 50/50 with colour to make a first coat. And a large quantity of Prepsol, to remove wax and grease and dirt from the surfaces to be painted.
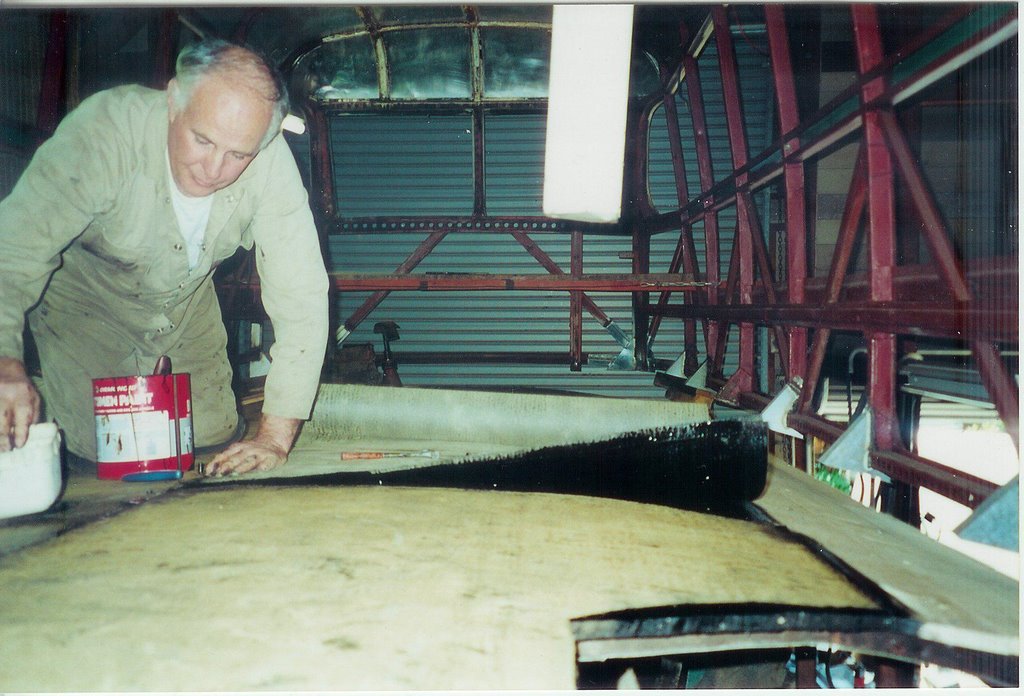
A first try at full painting of a test panel was not very encouraging, as there were very visible brush marks in the final finish. The rear of the same panel was cleaned up and at the second try the result was satisfactory.

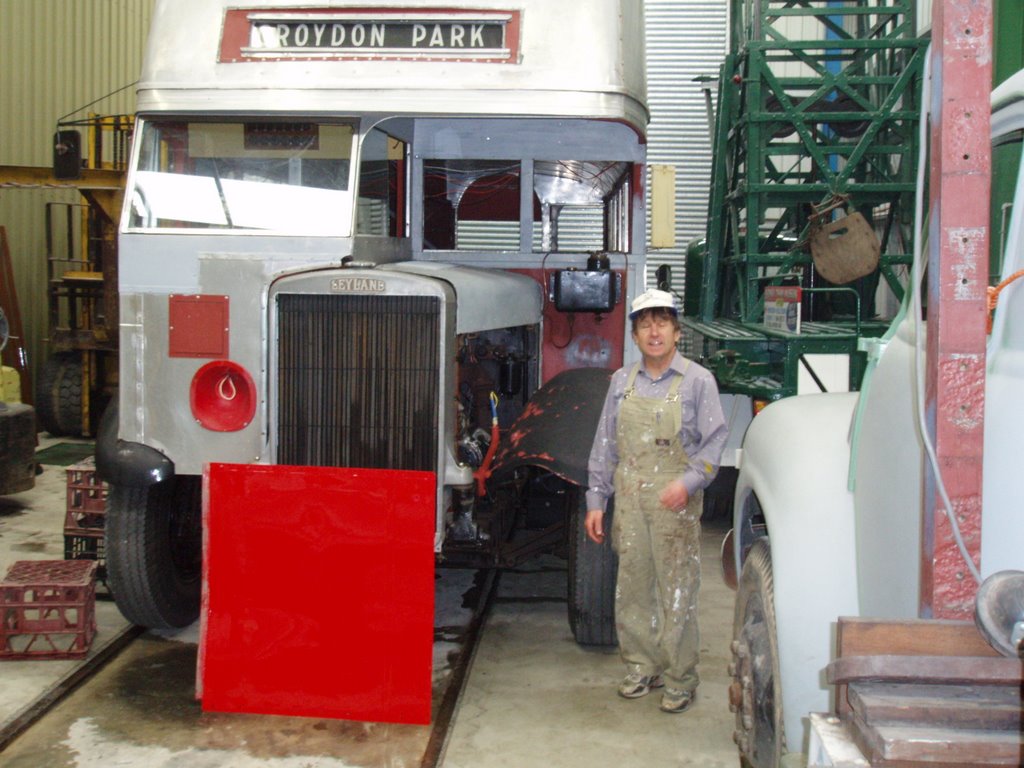
ROB, THE BUS, THE ANNEXE AND THE SECOND TEST PANEL SHOWING THE FINAL RED OF THE MAIN PANELS OF THE BUS.
Not seen are about 100 small items of mainly interior trim, pillar covers, advertisement racks, window trims, etc. painted in the brown paint from Scotland, called Nussbraun, "Nut Brown"; I believe the paint was made in Holland, and sent out to me at great expense in freight by my friend Paul Adams of Albion restoration fame (see links: Restoring a Sydney Albion).
However it is beautiful paint which flows out perfectly, leaving no brush marks and dries not too quickly, so there is time to 'lay off': ie do a series of smooth downward brush strokes with a very broad brush to remove excess paint and leave the painted surface evenly coated. Thinking about it, I think it's bit like the difference between Belgian chocolate and some others: the consistency is incredibly smooth, achieved by microfining the particles of colour.
There is a another dimension to the bus' presence at Loftus. Tuesday September 19th is the occasion of the launch of a book by John Dunn, a history of Comeng (Commonwealth Engineering) which in a previous incarnation was Waddington's Ltd, builders of the body of this bus. The speaker will be ex-MP Tim Fischer, and the bus will be a fine example of a pre-war Waddington body. The book is available from the bookshops of both Sydney Tramway Museum and Sydney Bus Museum, at $59-95 plus postage. It is lavishly illustrated with cars, buses, railway carriages and locomotives, steam and diesel, by Commonwealth and its predecessors.

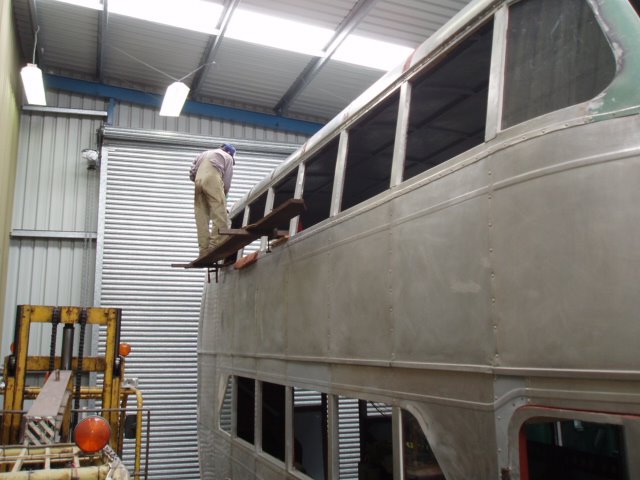
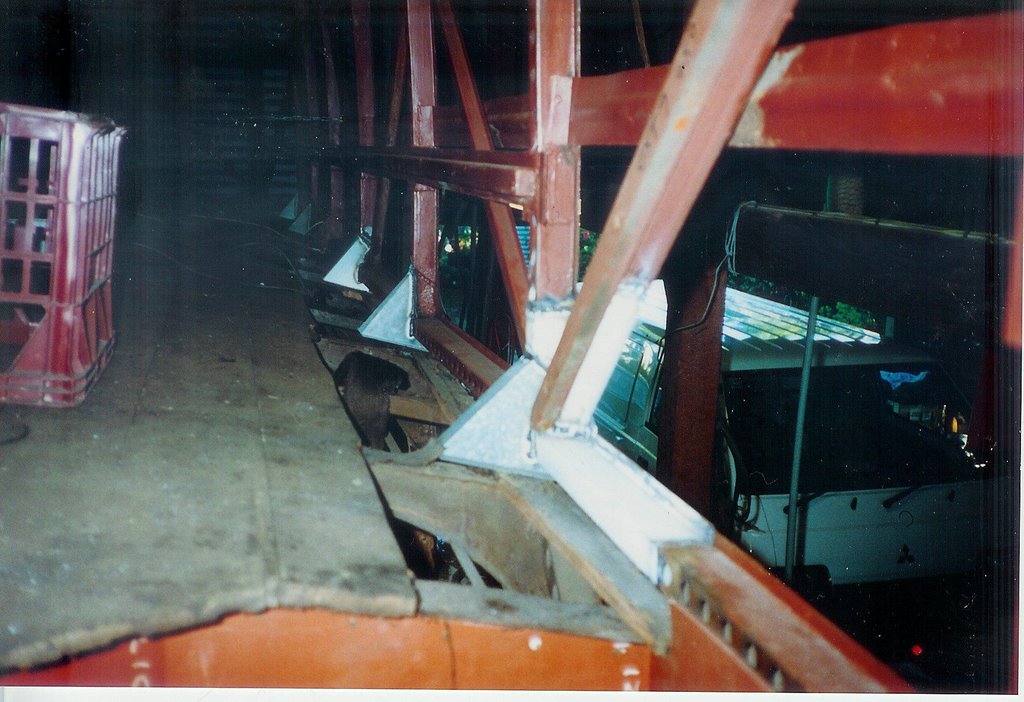
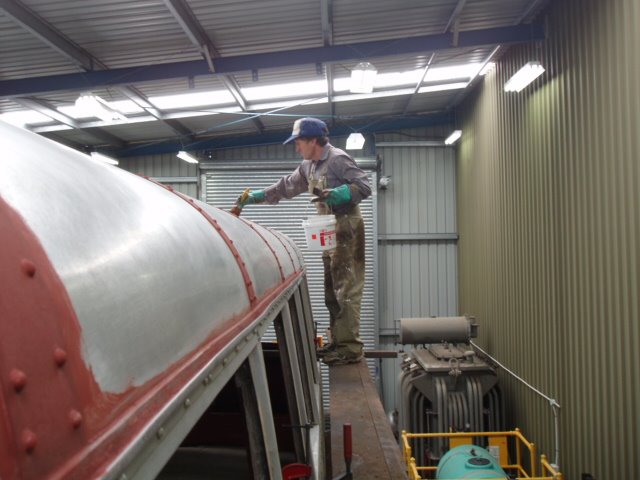
IN THE BELIEF THAT PAINTING WOULD HAVE BEEN DONE AT LEAST 18 MONTHS AGO, I HAD STRIPPED THE ROOF OF ALL PAINT AND LEFT IT BARE. Unfortunately the metal strips covering the joints between the aluminium roof panels are steel, and they had a heavy film of rust on them, so Rob is seen here coating them with metal primer. The gutter visible here was full of dust and has been vacuumed clean.


THE SAME SCENE, WHERE ROB HAS PROGRESSED TO THE REAR OF THE ROOF WHICH HAS BEEN CLEANED ALL OVER WITH PREPSOL TO REMOVE DIRT, WAX AND GREASE.


SYDNEY HAD JUST HAD A WEEK OF VERY HEAVY RAIN; ABOUT 5 INCHES HAD FALLEN TO EVERYBODY'S RELIEF, AND IT FINED UP JUST AS OUR PAINT JOB BEGAN. If not, drying of the gloss paint could have been affected. Here Rob begins the job of applying a mix of 50/50 undercoat and gloss brown to the roof.


Some of the hundred or so small items of interior trim in brown: the ones on the left hold safety rails along the nearside top deck windows. The DRTT got sick of passengers losing arms and heads by leaning out as the bus passed a shop awning or tree.

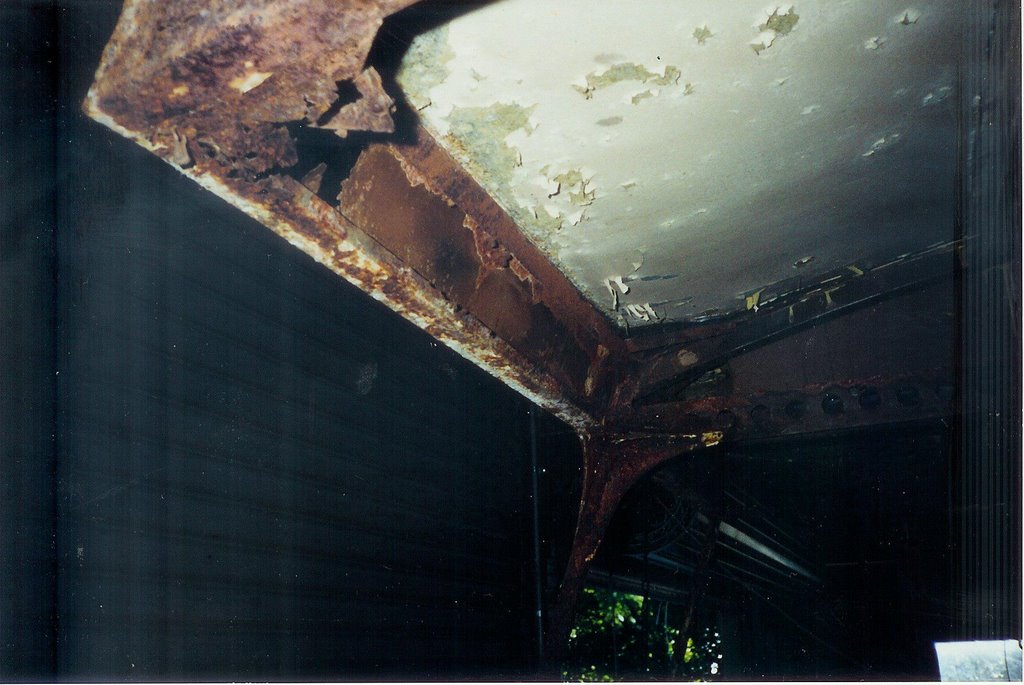
The distinctive "Camperdown" arched entry to the lower deck saloon. Very soon after this bus, the entry became rectangular with heavy angled braces at each side.

The ceiling in the lower deck has received its undercoat and first colour coat. Sept. 18th.

Rob applies cream 50/50 undercoat to the lower saloon entry: from this point inwards the ceiling is white.

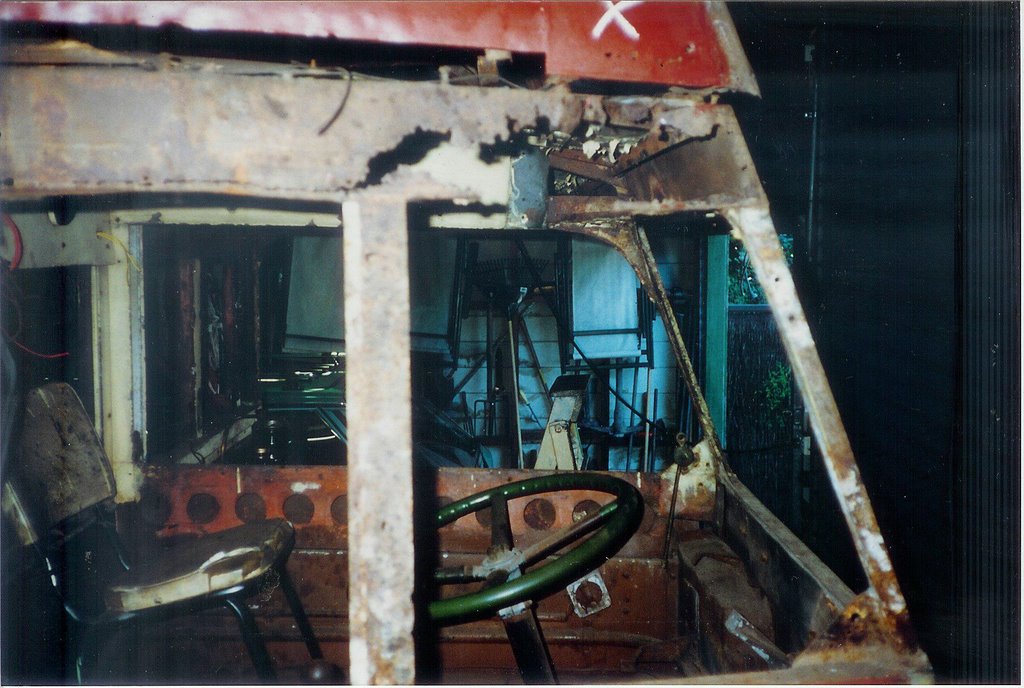
Rob squeezes into the driver's cab (minus the seat) to apply cream undercoat to the ceiling and pillars.

The ceiling over the engine bay is also cream, including the engine top cover and some of the bulkhead behind the autovac.

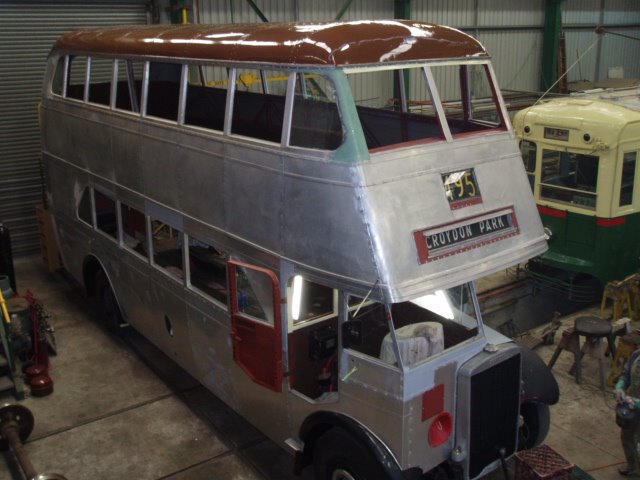
A view from the mezzanine floor in the main workshop, where the bus has been moved for the Comeng book launch on September 19th. The roof has had its colour coat.


THE REAR PLATFORM has acquired its final colour coats, but not the lining out in black between colours. Visible here are: LTE bus red, Nussbraun, and British Standard Colour 352, pale cream. The latter two were supplied with much effort and persistence by my dear friend Paul Adams in Paisley. The red had been acquired by David Wilson for use on the London RT bus and other Sydney pre-war buses at Tempe Museum.

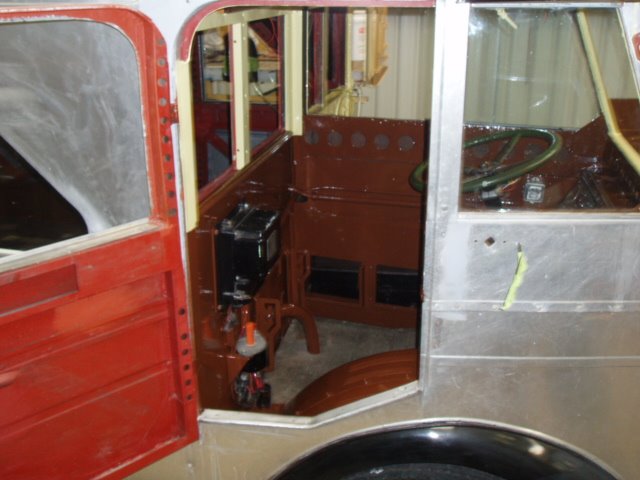
THE DRIVERS CAB IN FINAL COLOUR: the door has yet to be done , also in brown around the frame. The complexities of the colour layout can be seen: I have had to use post-war buses as the pattern for this, in the absence of any early photos of 1930s bus interiors. Here's hoping......

The stair well, in brown, with the red putting in an appearance on the stair valance (?) Is that what one calls it?

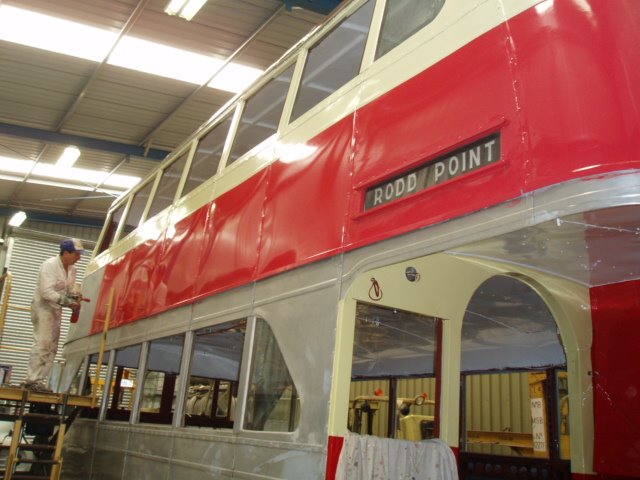
By the afternoon of September 23rd really visible action had begun. Back in the annex, somewhat freer of the dust problem, undercoating of the broad surfaces on the top deck began. Rob Gregor is seen, on the rather safer hydraulic scissor lift, applying a first coat of 50/50 white undercoat and red. The cream around the windows has been done. Rule 1: start at the top and work down.

Saturday, September 16, 2006

The Gearbox and Other Details.........

After the false dawn on the painting of the bus, when it went across to Smithfield in Western Sydney (under its own power) only to have a quote for $26,000 plus GST for painting in two-pack enamel, new plans are in place. It will be painted by Rob Gregor, who painted our Albion double decker 25 years ago, by brush, and so well that it still looks good and not a brush mark can be seen.
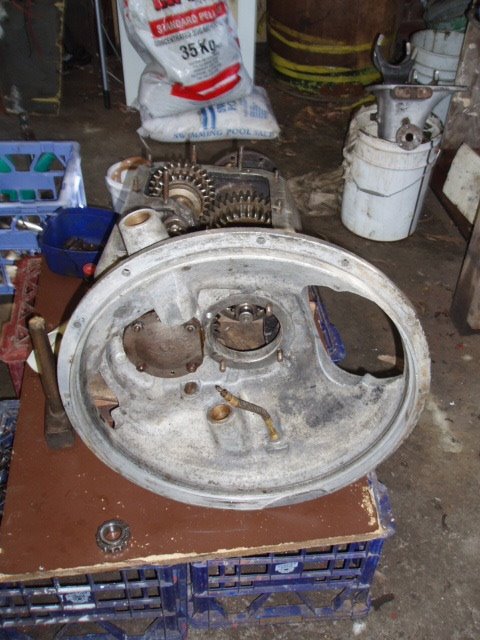
En route to Smithfield and then back to Turramurra, a nasty noise was evident in the gearbox: a clicking sound in second gear. So the gearbox came out and was overhauled here using bits gleaned from another box of the type to make one good box out of two. Click on a photo to enlarge it.


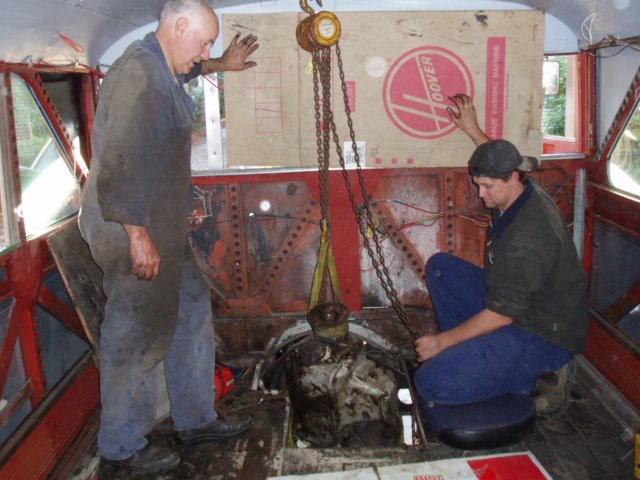
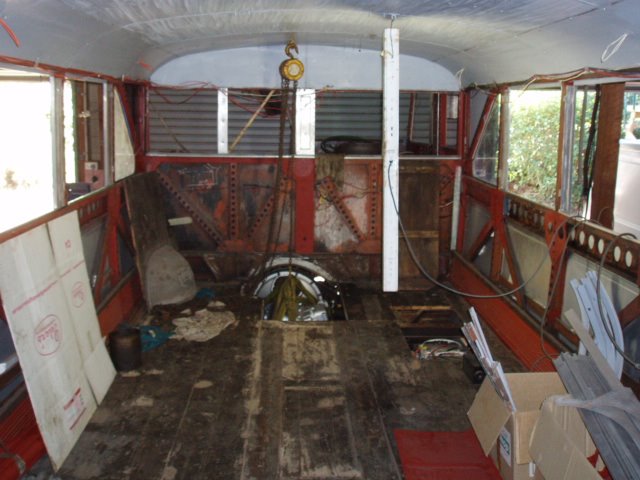
USING THE CHAIN BLOCK AND EYE BOLT IN THE SOCKET THOUGHTFULLY PROVIDED BY THE BODY BUILDERS IN THE ROOF OF THE BOTTOM DECK, THE GEARBOX, SEPARATED FROM THE ENGINE, IS HOISTED CLEAR OF THE CHASSIS INTO THE LOWER SALOON

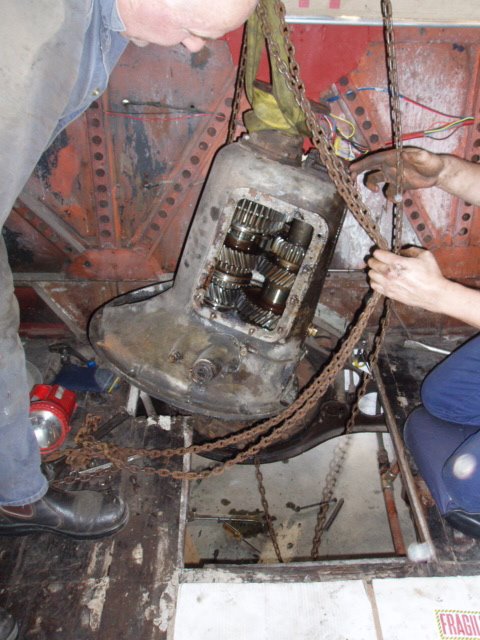
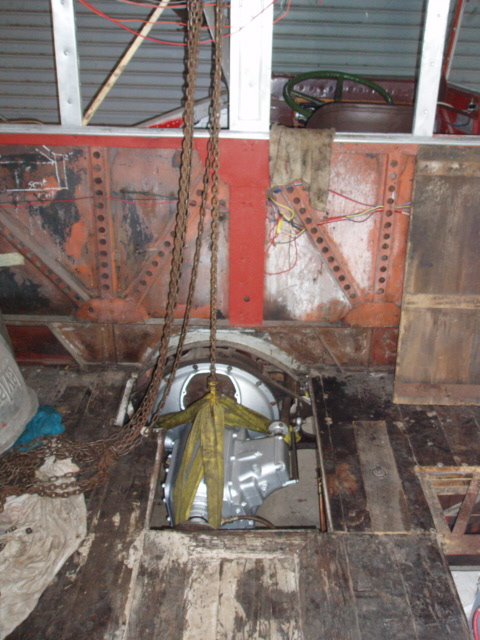
THE APERTURE PROVIDED IN THE FLOOR OF THE BOTTOM DECK IS NOT ENOUGH TO LIFT THE GEARBOX STRAIGHT UP: AFTER LOWERING IT TO THE FLOOR IT HAS BEEN SLUNG FROM ITS REAR FLANGE AND LIFTED ON END INTO THE LOWER SALOON. FROM THERE IT NEEDED TWO MEN TO CARRY IT OUT TO THE REAR PLATFORM TO THE WORKSHOP FOR DISMANTLING

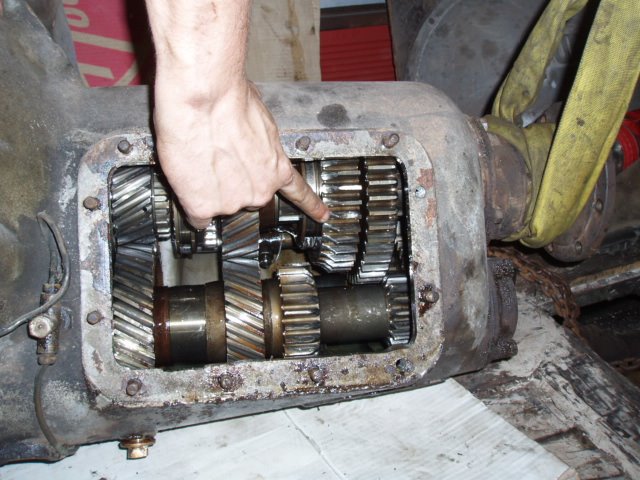
WHILE STILL IN SITU, THE GEARBOX WAS DRAINED OF OIL AND THE SIDE PLATE REMOVED. NOW, OUT OF THE CHASSIS AND RESTING ON THE LOWER DECK FLOOR, THE PROBLEM IS REVEALED. THE CENTRE PORTION OF THIS TOOTH HAS A LARGE CHIP OUT OF IT, BY WHAT MEANS IS UNCERTAIN: BECAUSE THE CHIP IS NOT AT THE FRONT OF THE GEAR IT IS UNLIKELY TO BE ROUGH ENGAGEMENT.

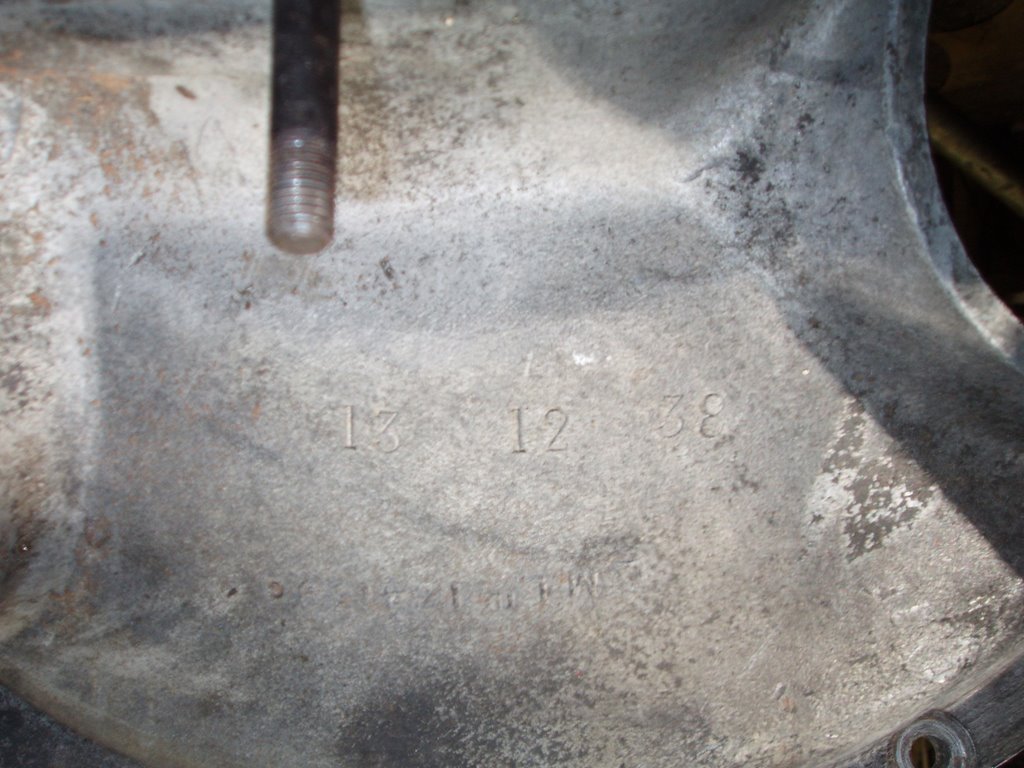
AFTER STEAM CLEANING THIS BECAME APPARENT: THE DATE OF ASSEMBLY, 13th DECEMBER 1938. THE BOX IS THEREFORE FROM A LEYLAND TD5, BUT AS IT IS IDENTICAL TO A TD4 BOX, IT HAS BEEN TAKEN FROM THE STORES AND FITTED AT THE BUS'S LAST OVERHAUL IN 1955. Elsewhere, on the top of the case, three sets of initials are stamped, and a type number, GB9B, and a reference number, probably its serial number. It shows the pride in workmanship that the team of three responsible for final assembly of the box, just twelve days before Christmas in 1938, have identified their job, but it may also be a means for Leyland Motors Ltd to identify those responsible if that box should have given trouble under guarantee!


AFTER DISMANTLING, STEAM CLEANING AND REPLACEMENT OF DAMAGED OR WORN PARTS, THE GEARBOX IS REASSEMBLED

VIEW FROM THE REAR OF THE BOX, PRIOR TO REFITTING THE SELECTOR MECHANISM AND THE SIDE COVER PLATE

THE GEARBOX SLUNG FROM THE CHAIN BLOCK HAS BEEN MATED BACK TO THE ENGINE AND CLUTCH HOUSING. While the box was out the opportunity was used to dismantle clean and overhaul the clutch, which showed signs of having had a birds' nest in it! It was full of wisps of grass and fluff. The pressure plate was sent away for machining smooth, although for its age it was not in bad shape with some very minor surface crazing.

RESPLENDENT IN A COAT OF SILVER PAINT THE GEARBOX AND DRIVE ARE READY TO ROLL. We can't wait to find out how it sounds and whether the clutch brake behaves itself.
Answer: the gearbox is fine but the clutch brake now works so effectively that it makes the upward gear shift quite tricky; one has to shift very fast or else fluff the change altogether. The technique, as advised by Craig, is to shift by barely depressing the clutch pedal, moving to neutral, clutch up while engine revs die away to idle, then again barely depressing the clutch move to the next gear. In other words, don't use the clutch brake at all, which comes in when the pedal is fully depressed.
The newly refurbished drive then highlighted a second noise problem: a shudder from the prop shaft and quite noticeable vibration at road speed. After arrival at Loftus a quick scramble around under the bus revealed that the vibration damper ironically is the problem: it is loose on the shaft. This will require removal of the universal joint at the centre bearing mounted on the chassis cross-member about halfway along the shaft, to expose the large nut securing the damper. As it has been loose for some time there may be some minor wear on the tapered hub of the damper, but it will enable it to be inspected closely for wear in the friction linings, and refitted in a cleaned and painted condition. This will have to wait until painting is complete because the process needs the bus to kept mobile at all times.

Saturday, August 12, 2006

While you Wait for Painting....

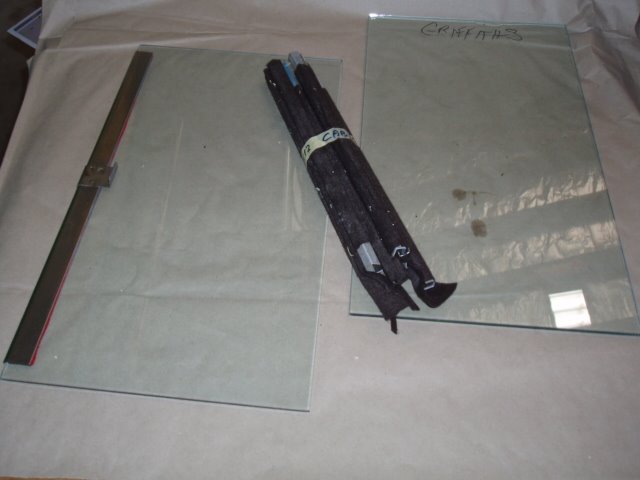
While the brown and the cream paint was ordered and being packed and shipped from Scotland, it was time to ensure that once painted, all components of the bus, mainly the interior, were ready to instal right away. This included seat frames and their cushions, plated parts, all the many panes of glass (the driver's cab alone has ten panes including all the sliding ones) and interior lamps.


SOME OF THE TEN PANES FROM THE DRIVER'S CAB, ONE OF WHICH CARRIES "DO NOT SPEAK TO THE DRIVER WHILST BUS IS IN MOTION", AND SOME OF THE METRE UPON METRE OF FELT-COVERED ALUMINIUM CHANNEL FOR HOLDING THE GLASS.


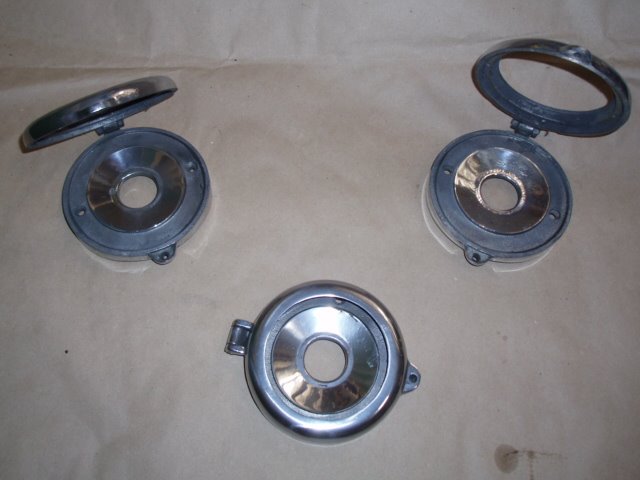
THE FITTINGS FOR THE 16 INTERIOR LAMPS HAVE BEEN POLISHED TO THEIR ORIGINAL GLORY.


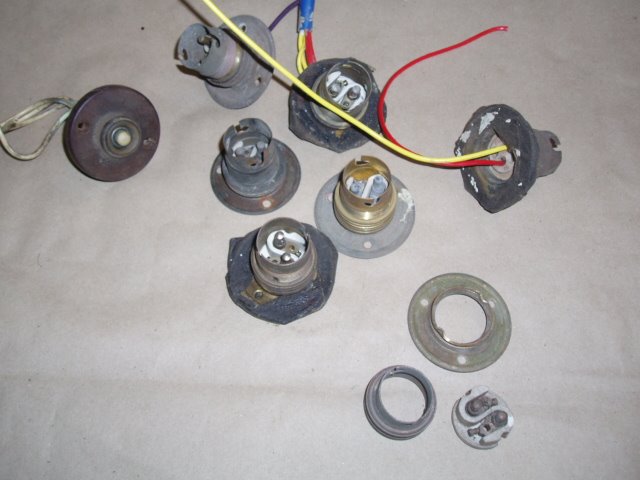
LAMPHOLDERS FOR THESE PRE-WAR LAMPS ARE UNUSUAL: THERE IS ALMOST NO SPACE BEHIND THE LIGHT FITTING TO ACCOMMODATE SOCKET AND CONNECTIONS. They are actually domestic 240 volt holders of the period, made of brass and ceramic. I HAD ONLY 9 OF THE REQUIRED SURFACE MOUNTING HOLDERS, BUT BY GREAT GOOD FORTUNE IT WAS FOUND THAT TRAMWAY SOCKETS ARE THE SAME AND LOFTUS HAD SOME SPARES. AT LEFT IS ONE OF THE THREE CONDUCTOR'S BELL-PUSHES.


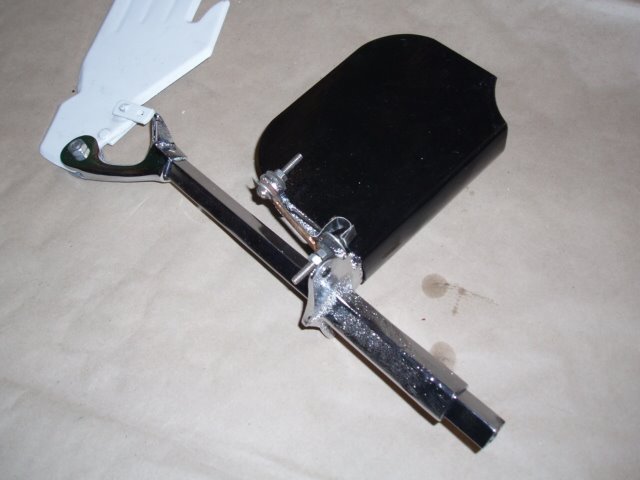
THE DRIVER'S MECHANICAL SIGNAL HAND. Before the advent of multi-lane roads and suicidal traffic this sufficed as both stop and right turn indicator. Pushed part way out it signals stop, and after squeezing a trigger and pushing it out fully, it signals right turn. A little lamp on the other side of the black housing comes on to illuminate it at night, operated by contacts visible here. Apart from the hand itself and the housing, all parts are newly replated.


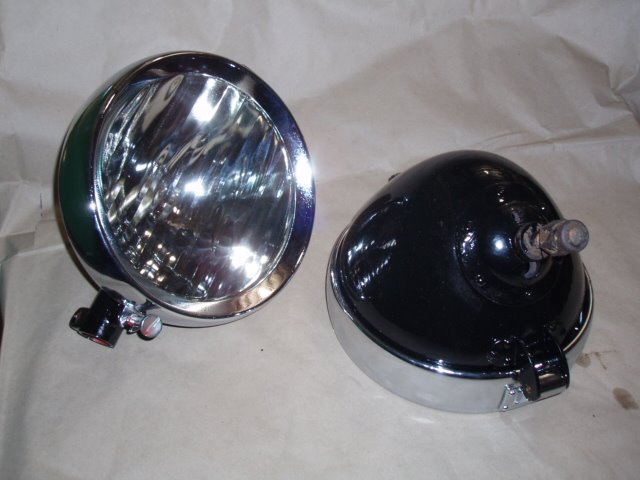
THE TWO GENUINE CAV HEADLAMPS WITH RIMS REPLATED, REFLECTORS POLISHED WITH SILVO, AND BODIES STRIPPED AND PAINTED.


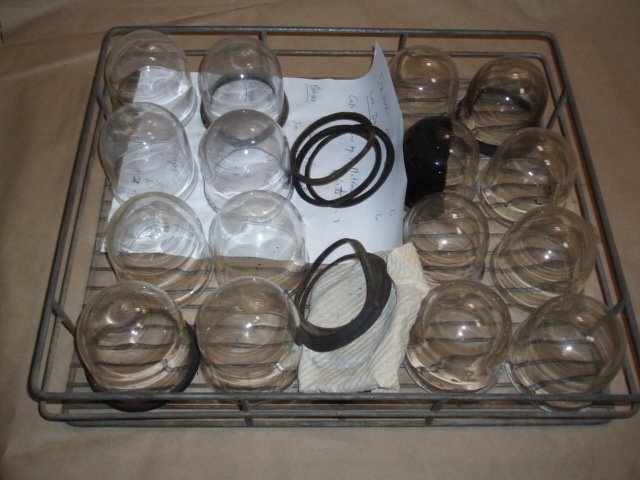
A SET OF INTERIOR LAMP "FISHBOWLS". SOME WERE FOUND TO BE ABOUT 3mm SMALLER IN DIAMETER THAN OTHERS, AND SIMILARLY THERE ARE SMALLER AND LARGER LIGHT FITTINGS. LUCKILY A MATCHING NUMBER OF EACH HAS BEEN GLEANED, ALTHOUGH ORIGINALLY THEY WERE PROBABLY ALL OF THE ONE SIZE. The one that looks half black, is: it goes behind the driver's cab and is designed not to shine forward.


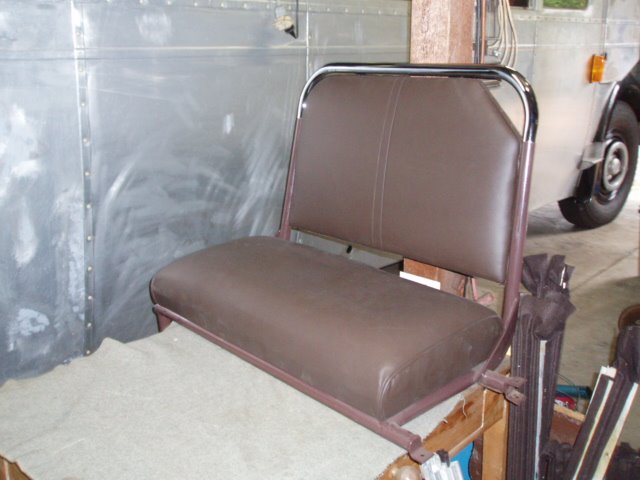
AFTER SOME CONSIDERATION THE DECISION WAS TAKEN TO GO THE EXTRA YARDS AND PAY MORE TO HAVE THE SEATS RE-UPHOLSTERED IN LEATHER AS THEY WERE IN 1937. THIS TURNED OUT SURPRISINGLY TO BE NOT ALL THAT MUCH DEARER: ANOTHER 20% ON TOP OF THE SAME JOB IN VINYL.


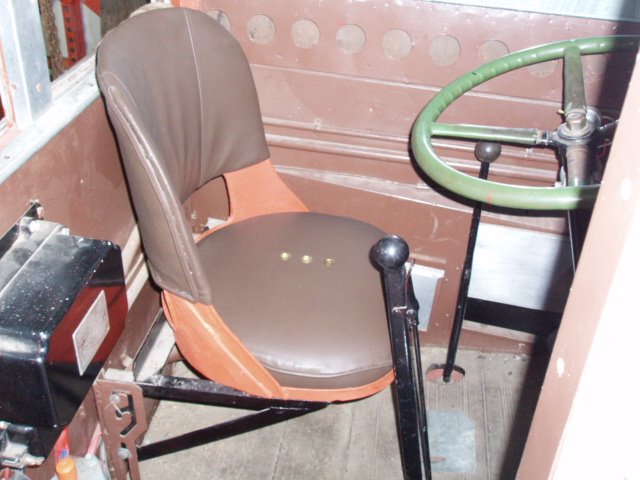
THE DRIVERS CAB. SEAT CUSHION AND SQUAB NEWLY DONE IN LEATHER TO THE ORIGINAL PATTERN.


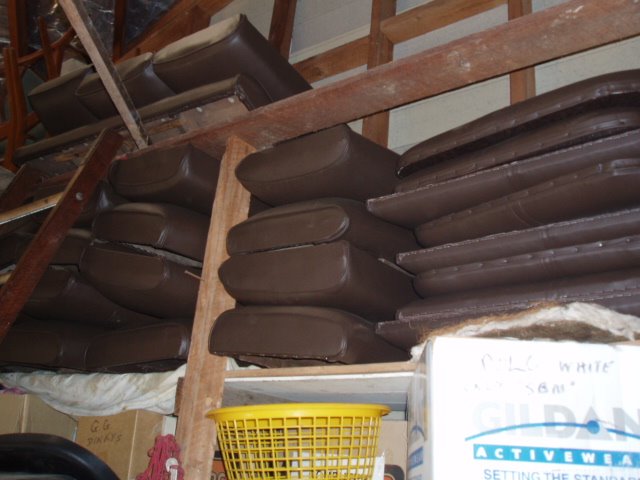
A PILE OF SEAT BACKS AND CUSHIONS STORED READY TO THROW IN ONCE THE SEAT FRAMES ARE BOLTED DOWN.


THE UPHOLSTERER ALSO HAD A BASH AT RETRIMMING THE DRIVER'S SUN VISOR. IN LEATHER. IT LOOKS A BIT BAGGY, SO MAY NEED SOME MORE STITCHING TO TIGHTEN IT UP.


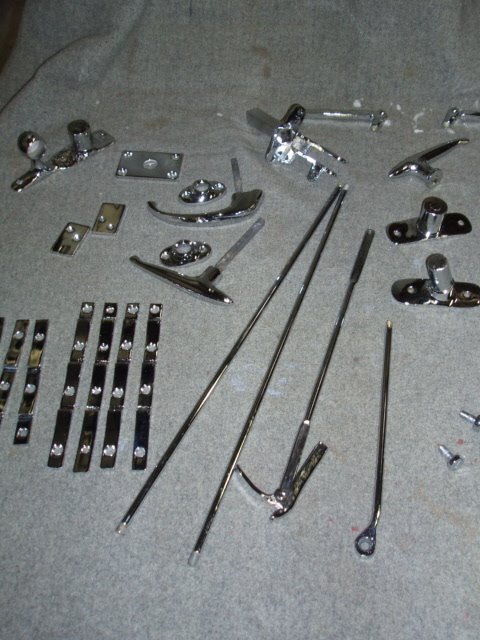
A FEW OF THE 150 OR SO ITEMS OF HARDWARE WHICH HAVE BEEN REPLATED IN CHROME. THE USE OF CHROME IS NOT STRICTLY ACCURATE: IN 1937 THEY WERE DONE IN NICKEL. HOWEVER, DON AT SWIFT PLATERS, SILVERWATER, EXPLAINED THAT IN THOSE DAYS THE PROCESS WAS DIFFERENT. NICKEL WAS DEPOSITED, THEN POLISHED TO PRODUCE A MIRROR FINISH. TO GET AROUND THIS, TODAY'S METHOD USES A NICKEL ALLOY WHICH PRODUCES ITS OWN LUSTRE, BUT TARNISHES AFTER A FEW YEARS. NOT WANTING TO BE FOREVER POLISHING UP ENDLESS NUMBERS OF BRIGHT PARTS, I OPTED FOR CHROMIUM PLATING, WITH ITS SLIGHTLY BLUER LOOK. THE PURISTS, INCLUDING ME, WILL HAVE TO MAKE DO.


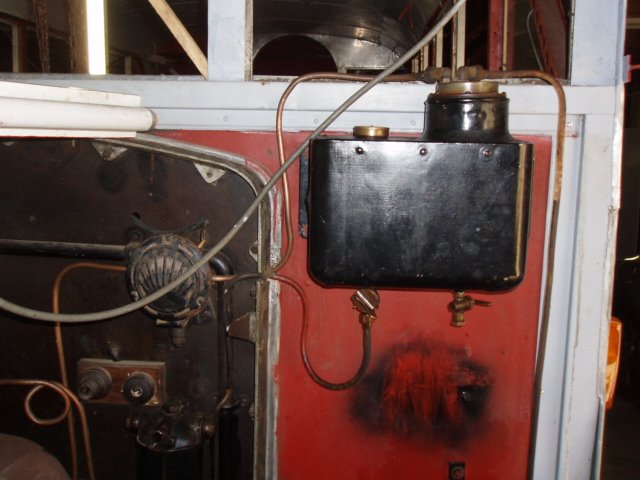
THIS IS THE AUTOVAC, A CONTINUOUS SOURCE OF LOW LEVEL DIFFICULTY. THE THREE-WAY COCK UNDER THE LEFT OF THE BLACK BOX OOZES DIESEL FUEL QUIETLY OVER A LONG PERIOD, LEADING TO A STICKY, DUSTY MESS ALL OVER THE BULKHEAD. I HAVE TRIED OIL JOINTING, CORK, AND FINALLY RUBBER AS THE SEATING MEDIUM FOR THIS COCK, AND SO FAR SO GOOD (AS OF 10 DAYS). A RECENT VISITOR'S COMMENT WAS WHY NOT GET RID OF THE COCK AND REPLACE IT WITH A NEW COUPLING? HERESY! THE MESS ON THE BULKHEAD IS A TD LEYLAND FEATURE, SO WE MUST PERSIST BUT AT LEAST DELAY THE PROCESS.

Sunday, June 25, 2006

The end of the second millennium

This is Part Three, the final, of the edited text of an article published in Australian Bus and Commercial Vehicle Heritage Magazine, reproduced by courtesy of the editors, Eileen and John Birchmeier. Click on a photo to enlarge it.

Sometime during 2000 in the midst of the work on the top deck, I was advised that a whole pile of seat frames at Tempe were to be sorted through and the surplus disposed of, so I thought I had better bite this bullet, selected a set of decent looking frames and by scientific packing fitted all thirty of them in my Mitsubishi van. However they were all post war frames, with the legs set in from the aisle by about six inches. Pre-war seats have the legs right on the aisle and they are also about 20 mm lower in height. So every seat frame had its legs cut off and measured and refitted right at the end of the frames, on the aisle. This was completed by Easter 2001, and they were all placed in position in the bus to see that the tops lined up. Note that some of the tops appear to have slightly different radius curves at their ends: this will be fixed when they all get new tops.

LOOKING TOWARDS THE STAIRCASE UPSTAIRS, SEAT FRAMES HAVE BEEN SET IN PLACE TO CHECK FITS AND ALIGNMENT WITH THREADED SOCKETS IN THE FLOOR. NOTE HOW THE LEGS STAND AT THE AISLE, TENDING TO CATCH PEOPLE'S FEET. THIS WAS REMEDIED IN POST-WAR PRODUCTION
These are stacked up outside still awaiting sand blasting and priming before receiving new chrome plated tops far cheaper than trying to replate the old tops, which are pretty rusty and pitted from sweaty palms.
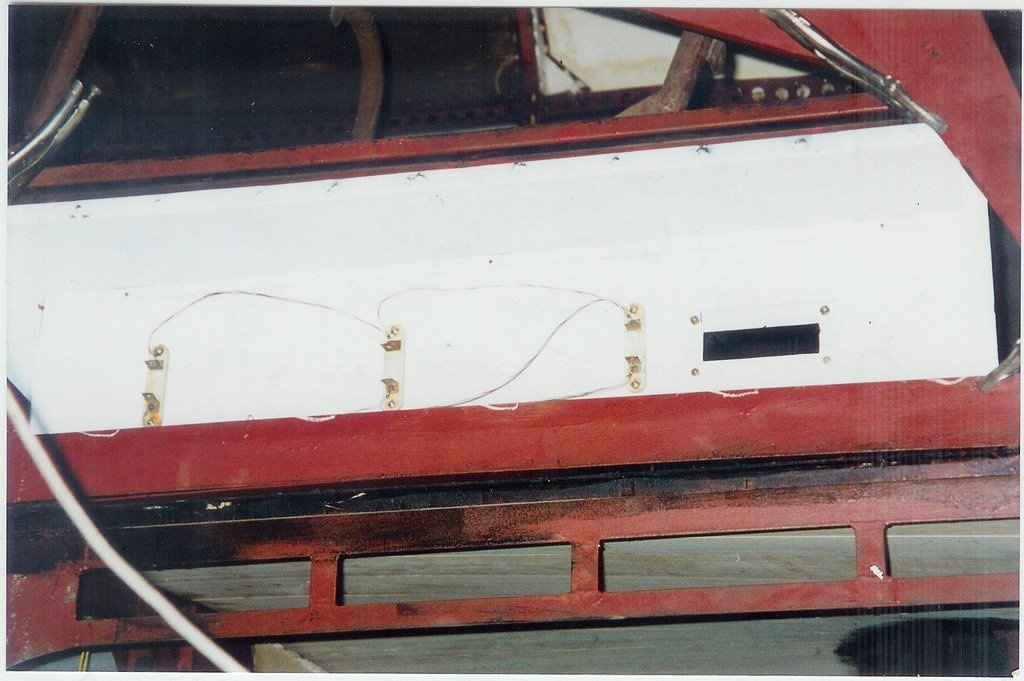
Then not wanting to face the mudguard problem, I made a new side destination box (out of the steel from a Hoover dryer) to replace the battered and rusted one, with new lights and wiring and mounts for the winder mechanism.

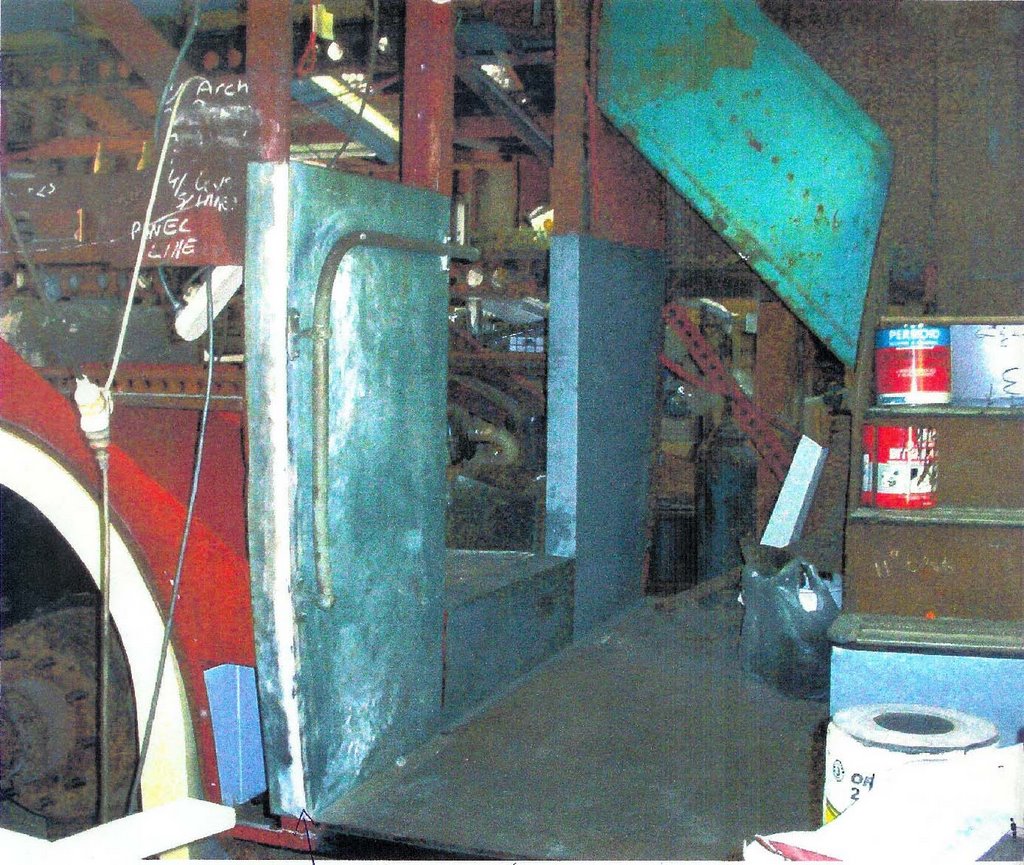
AN OUTSTANDINGLY MESSY SCENE; THE PARAPHERNALIA OF A RESTORATION. THE NEW DESTO BOX IN PLACE (CENTRE TOP, IN WHITE), THE CAB DOOR ABOUT TO RECEIVE ATTENTION FOREGROUND, AND A NEW DIAGONAL BRACE AND LETTER BOARD CAN BE SEEN CENTRE LEFT IN THE LAST WINDOW BEFORE THE REAR PLATFORM

A CLOSE-UP OF THE NEW SIDE DESTINATION BOX MADE FROM HOOVER DRYER PANELS. THE LAMP FITTINGS ARE THE ORIGINAL CERAMIC AND BRASS MOUNTINGS, TO, TAKE FESTOON LAMPS (12 VOLT IN THIS CASE). UNDER IT, THE LATTICE FRAMING OVER THE REAR PLATFORM ENTRANCE IS ALSO NEW TO REPLACE RUSTED SECTIONS April 2001
The cab door then got a makeover with some new framing. But eventually I had to face the music.
The mudguards were terrible. Even Brian Mantle, looking at the driver’s cab one, said ‘it’s pretty bad’. It is in two halves, an inner and an outer. The inner half was not too bad, but a mess where it joined to the cab floor boards and needed the whole bottom edge remade. The outer half was dented, torn and rusted away in many places. I started to panel beat it using oxy to try to shrink out the creases, not very successfully, and thought of Alan Fletcher who had a number of TD5s and might be able to help. He said to come and have a look and in July 2001 I raced up to Seaham imagining a semi-perfect mudguard just needing a bit of dressing and welding here and there.
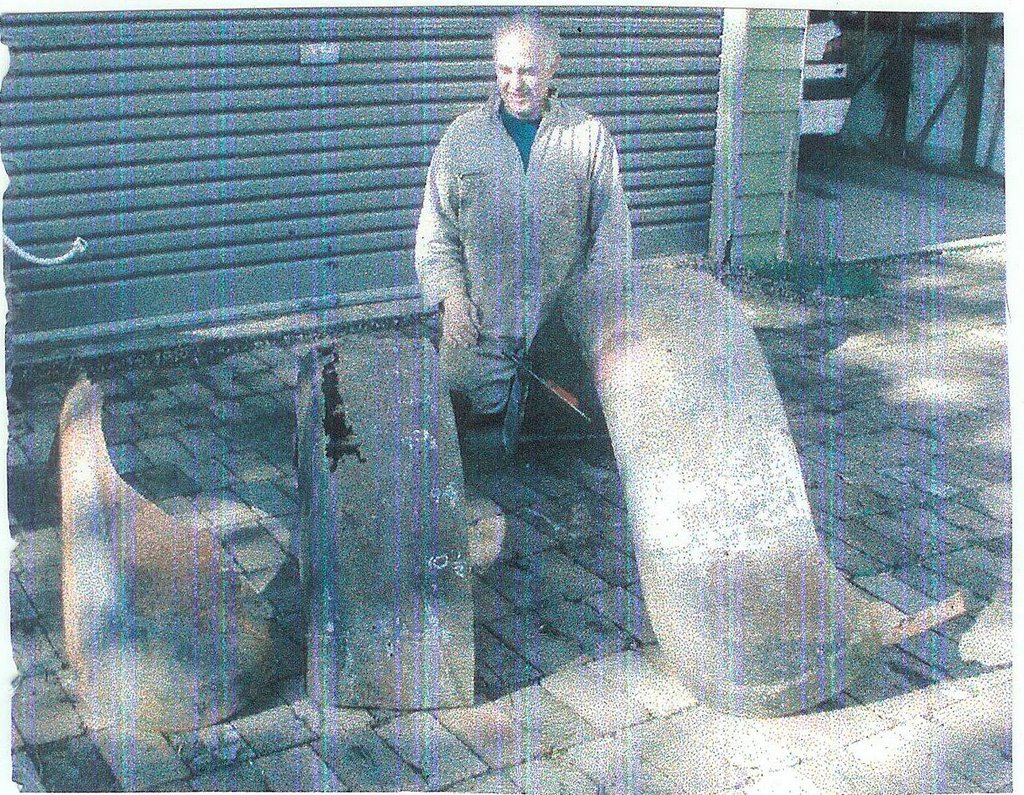
Alan’s front guards were worse off than mine. However, as we discussed the problem he generously donated a slightly modified post-war PD2 guard which, if I remember correctly, was meant for a Bristol double decker. It had the same external profile as a TD guard, but was different across the front and inside the cab and was slightly larger in diameter. The offside front guard now consists of the front twelve inches of the original, the middle of the PD2 guard, made narrower and reduced in diameter by cutting and shutting at several points, and a new rear flared section made from a Malleys washing machine rear panel.
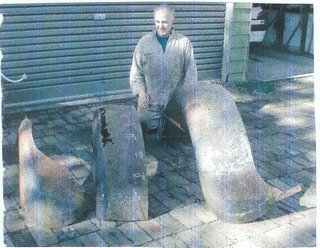
SCANNED FROM A VERY POOR PRINT THIS IS THE ONLY PHOTO OF THE OFFSIDE FRONT MUDGUARD TO SURVIVE.
AT LEFT IS AN UNUSED GUARD FROM ALAN FLETCHER WITH ITS RUST CUT OUT, CENTRE IS WHAT WAS LEFT OF THE ORIGINAL AFTER HAVING THE FRONT 12" CUT OFF IT, AND RIGHT IS THE FINAL ARTICLE BEFORE GRINDING AND SANDING SMOOTH.

THE VIEW OF THE ENGINE AND CAB THROUGH THE CAB DOOR AFTER STEAM CLEANING. THE PIPE POINTING DOWNWARDS AT TOP LEFT WILL CARRY THE WIRING TO THE STARTER, YET TO BE REFITTED. THE THREE RECTANGULAR APERTURES BESIDE THE ENGINE ARE THE DRIVER'S HEATER: SLIDING PANELS IN EACH ONE CAN BE RAISED TO LET NICE WARM AIR FROM THE ENGINE BAY IN DURING WINTER!
Whilst this was going on with the two front mudguards off the vehicle, the cab and engine area got some attention. The cab was stripped of everything and a new mounting bracket made where the offside mudguard attaches to the firewall under the driver. The old one, very rusted, was full of dead matches, many hundreds of them. Obviously drivers lighting a fag would drop the match with their right hand onto the bit of floor just behind the mudguard, so I guess there were about twenty-five years’ accumulated droppings there!

THE BUS HAS BEEN DRAGGED OUT OF ITS SPOT TO PERMIT STEAM CLEANING OF THE CAB AND ENGINE BAY AREAS. THE NEW FRONT SCUTTLE IS OBVIOUS, WITH THE ORIGINAL MOUNTING FOR THE OFFSIDE HEADLAMP REINSTATED AND THE DRIVERS AIR VENT RAISED BACK TO ITS 1937 POSITION (SEE THE 1938 SHOT OF THE BUS, IN "BACK IN 1937", BELOW)
The starter was overhauled and refitted, after steam cleaning the engine and chassis area. These got a coat of paint and a lot of details were attended to in the cab area. After stripping the interior of the cab of all paint and debris, much time then went into restoring all the gear in the cab: switchboards, fuses, wiring, buzzer, instruments, instrument board, voltage regulator, conduits, etc. A new front scuttle was made to permit the refitting of the headlamp bucket and the driver’s vent in their 1937 positions. Alan Fletcher gave me a genuine TD driving light switchboard to replace the missing one. This needed serious restoration to unjam all the switches and corroded terminals.
It is identical to an Albion CX19 one except that the starter switch is blanked off. (The TD4 has a weird 12v/24v changeover switch on the firewall behind the driver’s right leg to operate the starter). From model TD5 onwards this oddity was resolved by making the whole system 24 volts. I was surprised to learn later on while visiting UK that virtually all the their TD4s were converted to 24 volt systems. The reason for the difference was that as diesel engines came into common use in bus fleets, it was found that a 12 volt starter simply did not have the grunt to turn over a cold diesel engine with 15-1 compression ratio. A petrol engine with 4-1 compression, no problem.
The engine and diesel injection gear were next in line: these got a good clean up, a jammed fuel pump element was freed up, the timing and phasing of the pump checked and the injectors tested for correct atomisation.
In this way 2001 passed pretty quickly. Another wish list was made for 2002, including refitting the hydraulic brake mechanism, finishing all the mudguards, rewiring the whole bus, etc, etc.
The brakes were overhauled, with Marion Brake and Clutch Service in Belmore resleeving all the cylinders. The servo was tarted up, re-united with the master cylinder and the whole lot reassembled to the vehicle. With the cab floor out it was easier to get the tricky adjustment of the front pull rod from pedal to servo. All the lines were flushed through with methylated spirits under pressure, and repairs made to damaged sections. New hydraulic hoses miraculously came from Marions. The big vacuum pipe from tank to servo was badly crushed, so a new one was made by a plumber friend who sweated off the old fittings and brazed them onto the new 1 1/8 inch copper pipe obtained from Hornsby scrap metal, and did a very neat job of making a 90° bend in it. The heavy battery cables were made up and fitted to the changeover switch and starter, then the new cab floor could go in and be covered with malthoid.

MY FRIEND BARRIE KEYS, A PLUMBER, BRAZES THE SALVAGED FITTINGS ONTO A NEW MAIN PIPE FROM VACUUM TANK TO BRAKE SERVO. THE PIPE TO RIGHT HAD BEEN SQUASHED FLAT AFTER ARGUMENTS WITH EARTH BANKS OR TREE STUMPS DURING THE BUS' LIFE IN THE COUNTRY
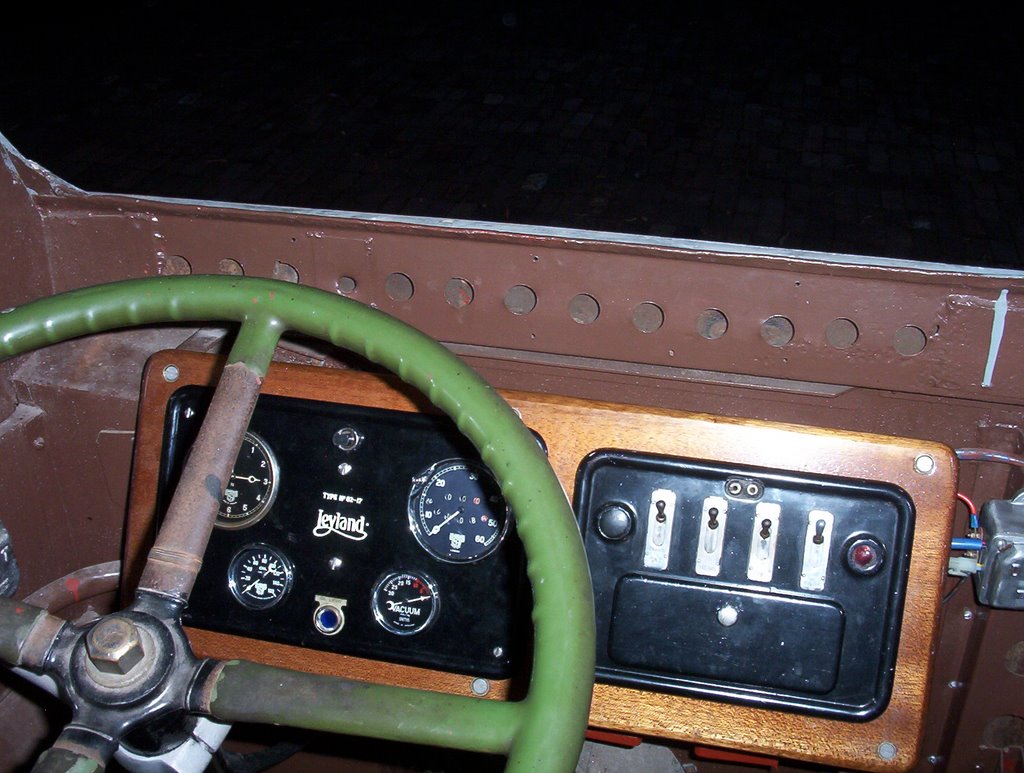
A new instrument board (made of wood and polished) was cut out of Pacific maple, the nearest thing I could find in appearance to the original. The metal instrument panel, after stripping two layers of brown paint from it, turned out to be black stove enamel with the Leyland logo in delicate white lettering in the centre. I gave it to an artist who touched up the lettering in model makers enamel. Very energetic enquiries were made to find a Smith’s eight-day clock to replace the missing one. Ron Button put me onto Barry Cliff in Elanora who had one! I had seen them for sale on the net for up to $600, and although Barry’s one was rough, he only wanted $80. Later Paul Adams from the Albion Club in Scotland, who had also been looking on my behalf, announced he had found one in very good order, and wanted nothing for it, as a quid pro quo for some assistance with Albion parts. Anybody want an $80 one?

AT LEFT ARE THE INSTRUMENTS INCLUDING REFURBISHED GAUGES FOR OIL AND VACUUM, SPEEDO AND 8-DAY CLOCK. AT RIGHT IS THE DRIVING LIGHT SWITCHBOARD
Then it was back to the mudguards. The nearside guard needed two patches about twelve inches square welded into it, a new inside bottom edge where it abuts the chassis, and a new rear flared section, plus many small dents removed. Two new mounting gussets which sit inside the guard out of sight were made and welded in.

THE UNDERSIDE OF THE LEFT-HAND (NEARSIDE) MUDGUARD, CLAMPED UPRIGHT TO PERMIT EASY ACCESS. THE TWO PATCHES AND THE NEW LOWER SECTION CAN BE SEEN. THE ARROW IS TO REMIND ME WHICH WAY IS DOWN: I FOUND MYSELF LOSING TRACK OF WHICH WAY UP I WAS SEEING IT
The roof front canopy had some serious dents in it, visible in the photo taken at Yeoval, so it was taken off and panel beating began. Brian Mantle advised taking it onto the lawn and stamping on it as a first step. I actually did this on a flattened washing machine carton and it worked. Then a lot of gentle tapping with a wooden hammer plus some body filler made it look pretty good.
On a friend’s suggestion, in mid-2002 I put an ad in Manly Backpackers Hostel to find a casual worker to do the horrible job of stripping off the ceilings, top and bottom deck. Danny, a young man from Queensland turned up and did a superb job, using a cup shaped wire brush in a four inch angle grinder. This took some weeks part time, and I then got him to strip off all the external panels using paint stripper, on which he also did a beautiful job. The ceilings were primed in grey etch primer. Now was a good time to install all the new wiring for interior lights, buzzer, tail/stop lamps, desto boxes, etc. The wire came from Hornsby scrap metal: somebody had just cleared out a whole pile of part reels of wire in all sorts of colours and sizes, perfect for the job and paid for with aluminium cans and scrap from my washing machine activities.

At last the possibility of repanelling could be contemplated. First though, one thing had to happen. Many years earlier at Tempe a new steel panel had been made for the front wall of the back platform, the one under the little window next to the seat over the nearside wheel arch.
This panel needed an external return edge welded onto it, all the way from top to bottom, and curved to the shape of the body. I had put this off because the weld looked so hard with every possibility of lumps or burn holes resulting. But the mudguards had gone well, so I gave it a go and the result was pleasing after a bit of grinding smooth and some filler. Now the first body panel could go on. Not just yet. First, more mudguards.

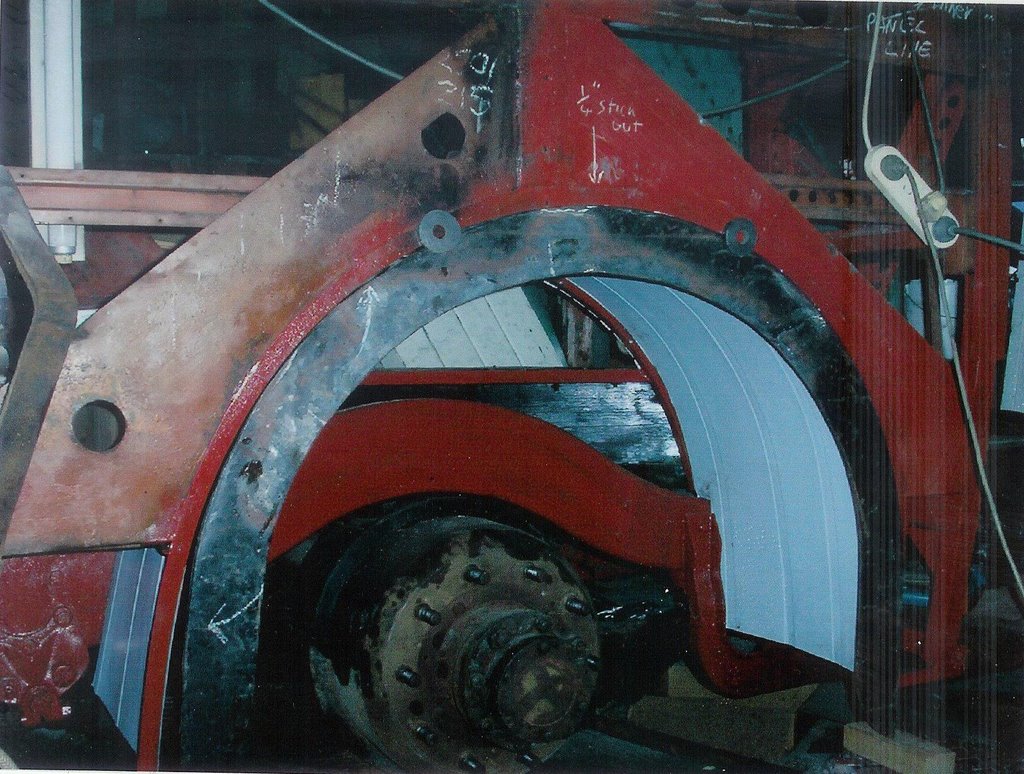
THE NEARSIDE REAR WHEEL ARCH HAS BEEN REPLACED, WITH THE ORIGINAL THREE SWAGES REPRODUCED. THE EXTERNAL MUDGUARD IS HELD IN PLACE WITH MAGNETS TO GAUGE HOW IT WILL FIT. IT HAS BEEN HEATED, SHRUNK, PANEL BEATEN AND WELDED TO RETURN IT TO SIZE AND SHAPE, AND WILL GET A NEW INNER FLANGE
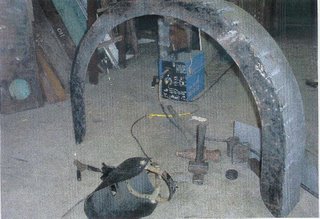

A NEW INNER FLANGE TACK WELDED ONTO THE RESTORED NEARSIDE REAR MUDGUARD
The two rear ones got new inner flanges, plus the outer faces heavily straightened and shrunk back to original diameter after many years of dents and tears had caused them to stretch to the point where they were bigger (49.5”) than their wheel arches (48”). Then the two rear wheel arches were remade in new metal with their characteristic pre-war swaging. Danny cleaned out and primed the chassis in those areas with the old wheel arches out of the way, and the wheel arches were welded in and their interior valances, those curved panels that sit under the two longitudinal rear seats, got new bottom edges where rust had attacked them, and were bolted in. It was now early 2003.
After Danny tore up all the old malthoid from the bottom deck floor some repairs were made to floor boards here and there and also to the boxing around the rear wheel arches. For some reason I felt the urge to make and fit the steel core of the eyebrow over the cab/engine bay. The steel for this had come from the same sheet as the offside rear wheel arch, so was lying around waiting to be used. The old one, although horribly rusted and plated over with two layers of aluminium to hide this, was able to provide a rough pattern for the new one. To my horror, I found on offering this up to the bus that I had cut off the front of the top deck floor boards too short. They have to stick out far more than I had expected. I was forced to cut and bend a batten and fix it across the front edges of the boards. The curve is pretty severe, but with much clamping and screwing, and the use of liquid nails, the batten went on and stayed on. I left it clamped for two weeks while the liquid nails hardened and it didn’t spring away at the ends. A borrowed planer was used to create the correct curve on the front of the batten. So the steel part of the eyebrow went on, got nailed in place and was left to await the aluminium sheathing which is the very last panel to be fitted onto the bottom deck.

CURVING DOWN THE SIDE OF THE BODY IS THE RETURN WELDED ONTO THE REAR PLATFORM BULKHEAD, A NECESSARY PRELIMINARY TO FITTING THE FIRST EXTERNAL PANEL
Up to this point almost everything that had been done, except the mudguards, was distinguished by the fact that it was all going to be covered up eventually by panels or flooring or trims. Exterior panelling is different: it shows! I sought advice from a real expert in the field, Chris O’Brien. Chris has generously given his time to ensure that the outer surfaces of the frame are good enough to take panels without creasing bowing or buckling. After considerable checking, the first panel, the nearside rear just in front of the back platform, was fitted on 15 June 2003. This was not a new one: the old one had a few minor dents and scratches which were dressed and filled with primer. This was partly because making a new one was quite tricky due to the need to match the shape of the wheel arch.

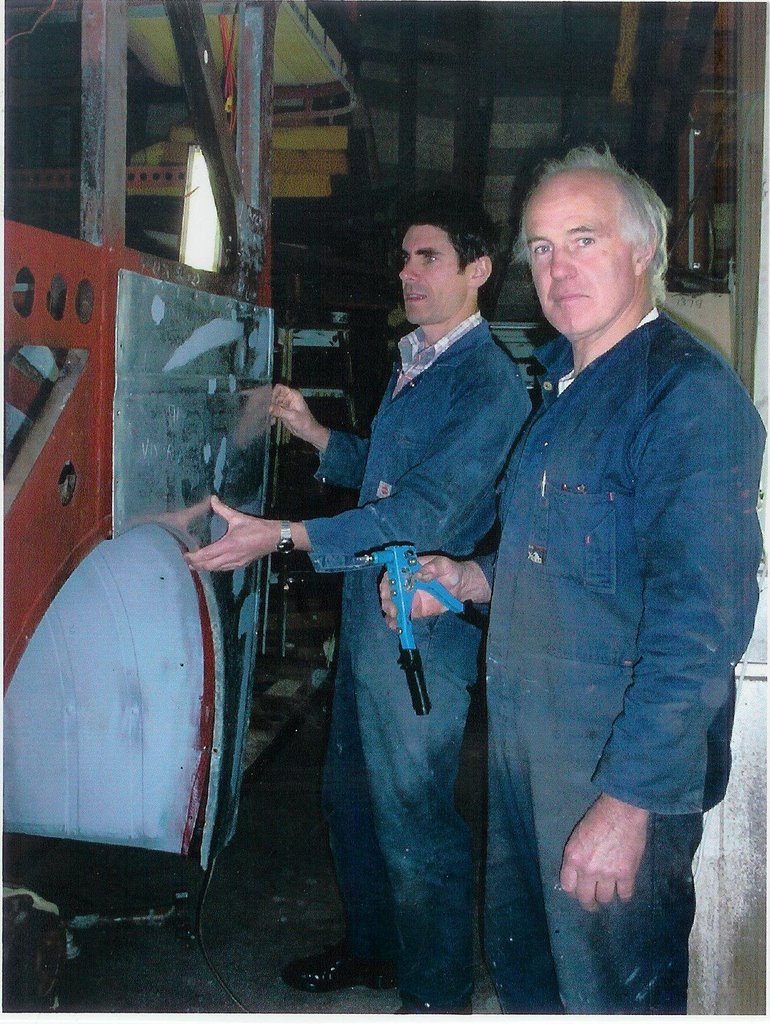
CHRIS O'BRIEN (CENTRE) AND SELF TRY NOT TO LOOK TOO EXCITED AS THE FIRST PANEL IS HELD UP IN PLACE. THE POP RIVETING TOOL WOULD NOT ACCEPT 1/4" RIVETS AND SO A SEARCH BEGAN FOR ONE THAT WOULD. NOT EASY TO FIND, IT TURNED OUT.
About half the original panels will be reused, but the rejects have not been wasted. They are cut up to make smaller items for other areas, such as sill covers, pillar caps and the two rear panels behind the back platform. In all only nine 8 x 4 sheets of aluminium will be used, obtained at rock bottom price thanks to Mal Morgan.
Once the first panel went on all the other bottom deck ones just seemed to fall into place. New ones are easy to make using the guillotine at Tempe and the precious swaging tool, for which the correct dies are on loan from Brian Mantle. There was a bit of caution needed with the panels that have swages curving up and over the engine bay and back platform, but under Chris’s eagle eye these have turned out beautifully. Similarly with the aluminium cladding of the eyebrow, which has a swage running across it from side to side and has to meet the cant rail swages neatly. Chris has a calm and patient approach which produced a successful outcome.
Brian also gave me his beautifully made rear destination box to replace the one removed and thrown away, probably in 1953 at the bus’ last overhaul. This is now in place with its mechanism and winder restored, as is the side box, made new a couple of years ago. A tiny flaw now emerges in the route number boxes: in 1937 they were a two-digit display. I have reluctantly decided to retain the 3-digit display because 1) it makes life easier and 2) it enables today’s three-digit routes (eg 444) to be displayed.
The whole of the bottom deck is now panelled and by the time this text appears the top deck should be largely completed. After that only the roof remains as a major battle zone. It still has quite a few dents and needs to be stripped of paint. Although most of the original syndicate members have melted away, Gwilym still helps me when he can, David Wilson helps with advice on obscure body detail and, best of all, with small components which have gone missing over the years, while Brian Mantle is a fount of wisdom on body building techniques.
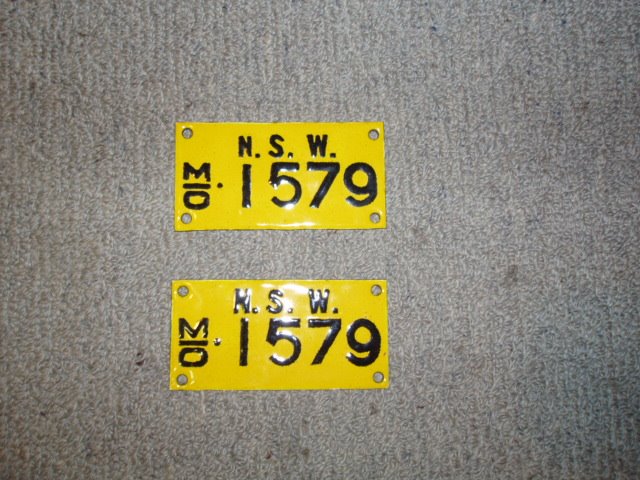
With the bottom deck panelled it is now possible to look at the interior with some interest. I was anxious replace the small enamelled rego plates which appeared on the front and rear bulkheads downstairs. Vic Solomons lent me m/o 1567, which has all the digits necessary to make a 1579 copy (by turning the 6 upside down) and I began to ring enamellers. These days all they want to do is your bath, and that not even in vitreous enamel, but I found a very helpful lady at Australian Craft Magazine who put me onto Ken Joyce in Dulwich Hill who does jewellery and vitreous enamelling. He happily took on the job, so we will have two m/o1579 plates in yellow and black, in the correct numeral style, one of these days. David Wilson and I are still trying to find somebody who can make several copies of a pre-war 44” destination roll, not only for this bus but for other pre-wars that need them. Not surprisingly, some of the old skills are hard to come by.

THE TWO VITREOUS ENAMEL FACSIMILE NUMBER PLATES WHICH WILL GO INTO THE LOWER DECK, ONE AT EACH END BULKHEAD. I suppose they were meant to reassure passengers that the bus was actually registered as such.
From time to time it appears to me that the works described above are taking a very long time to complete. The feeling only increases when one reflects that from June 1937 when m/o 1579 hit the road, to approximately June 1940 when bus deliveries ceased owing to World War Two, a total of about 320 buses were delivered to the Department of Road Transport and Tramways. Of these, over 300 were bodied by Waddingtons – a rate of two per week. Maybe it is easier to make new than to fix old ones.
Recently I heard on the radio a discussion about the things it takes you most of your life to learn, but nobody ever tells you. One was there is a fine line between ‘hobby’ and mental illness. I wonder. Finally, can anybody help me with photos of the interior of a pre-war decker, showing the original signwriting?
Anatomy of a Restoration

This is Part Two of the edited text of an article published in Australian Bus and Commercial Vehicle Heritage Magazine, reproduced by courtesy of the editors, Eileen and John Birchmeier

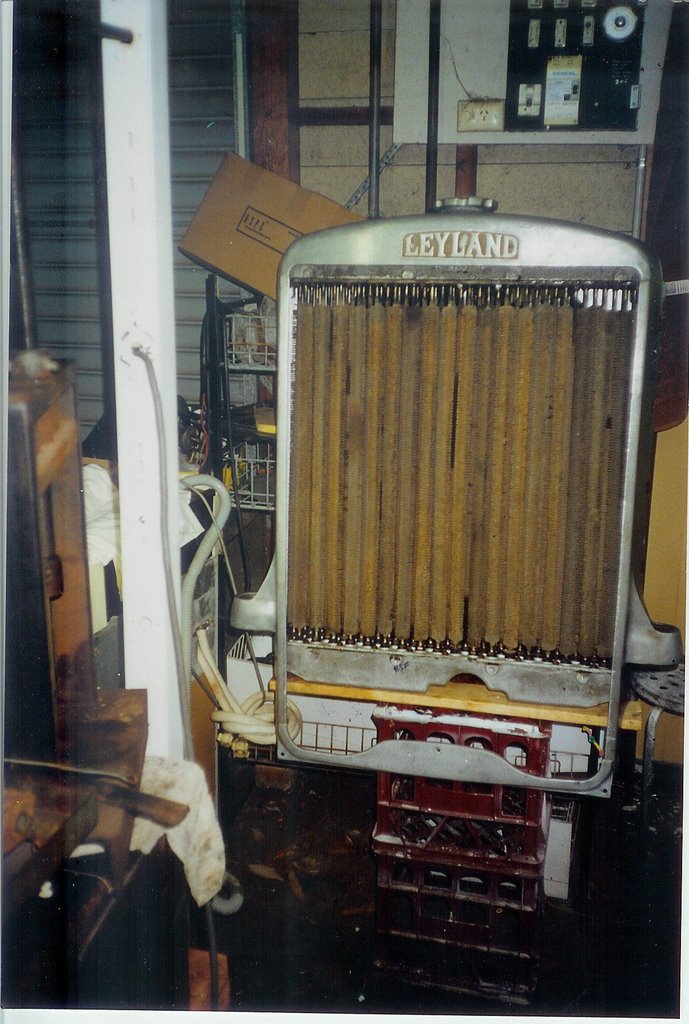
Every so often I look around for something easy and dramatic to do, rather than face the hard stuff like rusted frame parts. The bus had come with a radiator, although not the one shown in the photos taken at Yeovil, where all the gilled tubes were missing. In all there were enough parts to make three radiators, but I soon found that there were two makers of radiators for TD Leylands: Coventry Radiator and Presswork (CovRad) and Leyland Motors Ltd (LML). Not a single part from one type will fit the other, except the screw cap! So the bits were sorted through to see what would produce the best outcome, which is now a CovRad. Brian Mantle had given me a brand new unused radiator grille, but unfortunately it was for LML, and would be hard to fit neatly. But luckily from somewhere there turned up a CovRad one, a little battered but easily straightened and welded up, and after sandblasting and priming it looked first class. The main difference is that its mounting holes are in different places, and because the vertical grille bars are much closer together in the LML version, there is no way to make new holes without cutting into a bar. Arthur Gillott gave me a brand new filler cap to replace the heavily mauled one. Now all that is needed is the curly bit of pipe that joins to the bottom of the radiator and squeezes past the front chassis crossmember. I have lots of Albion ones, so a bit of judicious cutting and welding may do the trick.
Actually I later found the original Leyland one, carefully placed so I would not lose it, in with the Albion ones in my parts stash.....

THE COMPLETED RADIATOR MADE FROM THE BITS OF THREE OTHERS AWAITS ITS REFURBISHED GRILLE AFTER BEING WATER-TESTED,
Then, all the top deck window sills (waist rails I discovered recently they are called) were made new and replaced, and the top deck generally rendered structurally intact.

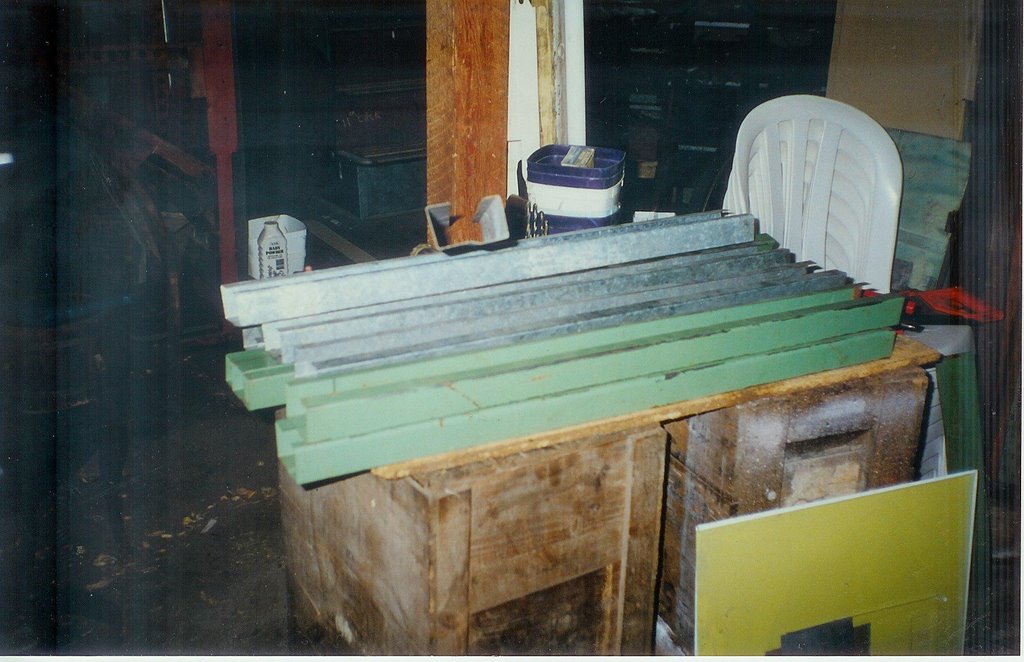
NEW WAIST RAILS (SILLS) MADE FROM ODDS AND ENDS OF SCRAP STEEL LIE READY TO GO IN. THE PHOTO IS DATED APRIL 1998
The flooring of the top deck, which is actually part of the bottom deck, and forms its roof, was rotted for one or two feet in from the front and rear, and for about twelve inches in from each side. It may have been possible to just patch this – but a huge problem arose, of how to curve just three or four feet of new tongue and groove board down at the front and rear. By this time I was getting pretty gung-ho about making and fitting new components, and I decided to simply replace the whole floor, thus giving plenty of leverage to get the front and rear to curve down. Even so, it still proved to be quite an undertaking.
To start with, the top deck had to be lifted clear of the bottom deck. This was no problem. Every single one of the feet of the top deck pillars where they bolt to the floor had rusted away. There was virtually nothing holding the top deck on! One symptom of this fact was that the bottom edges of some of the top deck panels had holes worn in them from rubbing to and fro on the top edges of the bottom deck. A heavy wood and steel beam was made up and inserted under the sills of the second front top deck window, and a heavy screw jack set up over the centre of the very strong bulkhead forming the firewall behind the engine and cab. Gingerly the jack was extended. The beam didn’t bend. The sills (newly fitted) didn’t tear away from the top deck pillars. The firewall didn’t disappear downwards onto the garage floor.
The entire top deck frame lifted 18 inches at the front, AND remained straight from front to rear, without sagging in the middle. The new sills and skirt rail and sections of pillar that had been renewed all took the strain. All credit to the designers of that frame: it is very strong.

THE OFFSIDE CANT RAIL AND ABOVE IT THE CORNER OF THE TOP DECK; 'X' FOR GOTTA GO
At this point the badly deteriorated lower front corners of the top deck could be accessed easily. They are very complex, having the rounded corner pillar, two skirt rails, and two angle braces all meeting at the one place. Luckily there was a short length of the rounded corner pillar section lying around at Tempe, somewhat different in dimension but having the correct radius curve. The necessary short pieces of skirt rail at side and front, plus the angle braces, could all be made up and welded into place along with new mounting brackets which enable the corners to bolt to the floor at front and side. These corners took weeks, with great care needed to maintain alignment in all directions.

NEW PILLAR BASES HAVE GONE IN ON THE NEARSIDE, AS WELL AS A NEW SKIRT RAIL. THE WIRE AND TURNBUCKLES FROM SIDE TO SIDE OF THE FRAME ARE THERE TO ALLOW IT TO BE ADJUSTED PRECISELY FOR WIDTH, AS WITHOUT ITS FLOOR BRACKETS BOLTED DOWN, THERE IS NOTHING TO PREVENT IT SPREADING AT THE LOWER EDGES
Then came the feet of all the top deck pillars. Compared to post-war deckers, these have huge angled mountings which protrude into the top deck floor area (look upstairs in Leyland 1438 and AEC 1286 to see what I mean). One and one only bracket escaped replacement: the third one from the front on the offside. I kept it for old times’ sake and because it was only slightly corroded. New ones were folded up from metal obtained from Wilkins Servis washing machine panels. These were a boon – 1mm thick, and galvanised and painted.

A VIEW INTO THE TOP DECK FROM THE STAIRWELL, WITH ROTTED FLOOR BOARDS REMOVED ON THE OFFSIDE AND NEW PILLAR FEET IN PLACE. THE SOLE SURVIVING FOOT IS THIRD FROM THE FRONT, STILL IN DARK PAINT.
The vehicle is now an amalgam of Wilkins Servis and Malleys washer, Hoover washer and dryer, Vono bed base and sheets of galvanised iron scrounged from roadside cleanup days and North Ryde waste treatment station! The original oregon floorboards, each of which was one length from front to rear, would be taken up one at a time and replaced with new boards milled to size from recycled hoop pine which I was advised would bend easily without cracking when the time came. However the recycler in West Botany Street Rockdale just smiled when I asked for single boards, some up to eight metres in length. The best they could provide was 5.2 metres. So every board would have to have a join in it somewhere along its length, and care was taken to stagger the joins so they didn’t all occur at one roof bow.
Firstly however, it dawned on me that some of the outer extremities of the lower deck roof bows had rust in them, and so could not have boards screwed to them just yet, and the cant rails (I call them) over the engine and cab were useless.

A VIEW OF THE CANT RAILS OVER THE ENGINE BAY. WITH THE TOP DECK FLOOR REMOVED ACCESS TO THESE WAS A LOT EASIER
A sheet metal firm at Brookvale folded up a new front header rail for over the engine bay and cab. It is seven feet long and the folder at Tempe can only take four feet max. The cant rails, which are curved, were made at Tempe then cut at three or four inch intervals on their inner edges with a hacksaw, and welded up to create a curved box section. With the first three feet of boards torn up at the front, a new ceiling of thin galvanised sheet was laid in over the cab/engine bay.
The diagonal windows on each side at the rear of the bottom deck got new diagonal braces and letter boards above them. The frame over the rear platform entrance was totally remade, using Vono bed base side rails (1.5”x 1.5” angle) and steel strip. The framing under the nearside rear destination box was remanufactured, having been affected by water leaking onto it from the leaky putty around the fixed window above it. The driver’s cab door aperture needed repairs, so that the door could be trial fitted to ensure that the new cant rail above it was in the right place, and the shape of the door space had not suffered from all the goings-on around it.
Brian Mantle was in the background all this time, advising how to curve a box section, how to create a pillar in top hat section, how to ensure a straight line from front to back – in short pretty well everything I didn’t know about sheet metal work. Meanwhile my control over the welder got better and better, until I now feel almost confident about undertaking a weld in any position. However it remains true that welders have minds of their own and have good days and bad. The government should do something about it.
At last the bottom deck around its top edges was good enough to receive floor boards.

FLOOR BOARDS GO IN. THE BEAM AND JACK FOR RAISING THE TOP DECK FRAME CAN BE SEEN. THE WEDGES AND BLOCKS WERE TO AID IN CRAMPING THE BOARDS CLOSELY TOGETHER.

During the process, great care had to be taken to find the sockets attached under two of the boards for seat attachment, which were faithfully reproduced. At this point it was noticeable what a tiny amount of room there is between the upstairs front seats and the front windows. People were nimbler then. After many months of frame repairs and laying of floor boards, the top deck floor was complete. It looked superb in fresh clean hoop pine and it was a shame to think it would all be covered in dirty old bitumen paint and malthoid.
However at the front and rear, uncut edges of floorboard stuck out into thin air. They had to be curved down, mainly at the centre, to meet the header rail at the front and the frame over the back platform at the rear. I thought about this for a long time, having abandoned the idea of steaming the boards to curve them, because each board would have to be steamed and curved before I laid it, making a real nightmare of trying to match the curves perfectly. I had even bought an old copy of Woodwork in Theory and Practice by John A Walton, my old woodwork teacher at Canberra High School, to find out how to make a steamer and do the curving. Relying on the fact that the cant rails and header at the front were new and strong, I thought I would put a beam under these and a strong plank over the floor boards above and try to draw the ends of the plank and beam together with 5/8” threaded rods and nuts at each side.
With all this set up, I started tightening the nuts on the threaded rods. The hefty 12” x 2” builder’s plank just curved up in the middle, and the boards moved down about two or three inches of the six inches needed. Some major weight was needed on the centre of the builder’s plank. The top deck was available, so it was lowered on its jack onto the rear of another beam resting fore and aft on the plank and poking out over the front of the bus, where it was tied with fencing wire to the front chassis crossmember to stop it swinging up. This did the trick, and eventually with the help of lots of kettles of boiling water, the boards agreed to curve down evenly to meet the front header, where they were attached with heavy 1/4” roofing screws, two per board, into the header rail. After a few days I apprehensively took the weight off the jack, but all the planks stayed put. The strength in those planks is one of the major reasons that the four passengers in the front seats don’t fall down onto the engine and driver.

LOOKING FORWARD FROM THE STAIRWELL, THE NEW MALTHOID FLOORING COVERS UP THE BEAUTIFUL HOOP PINE BOARDS
In order to surface the floor the top deck had to be raised again, at its original jacking point, and malthoid was laid, moving the jacking point around a bit to enable the flooring to be laid all the way across. Malthoid is miraculously still available from Hardware and General at Brookvale, but called damp coursing, in up to one metre width.

BITUMEN PAINT IS USED TO CEMENT THE MALTHOID DOWN. THE NEW SILL RAILS LOOK AS IF THEY HAVE BEEN THERE FOREVER
With the malthoid down the top deck was ready to be firmly reunited with the bottom deck for possibly the first time in thirty years. Each pillar footing now has four bolts holding it down, through the floor boards to the bottom deck framing, plus another four bolts at each of the corner mountings at front and rear. I remain amazed that it didn’t blow off during the tow from Tempe to Turramurra.

FIRST HESITANT STEPS IN LOWERING THE TOP DECK ONTO ITS NEW FLOOR. THE TWIN ROWS OF BOLTS FOR THE SEAT MOUNTINGS ARE VISIBLE IN THE FLOORING.
It was now December 2000, the end of the millennium. The new millennium (the real one) would begin in 2001, with a list of goals for the year. This included getting the top deck bolted down (completed in the first week of January) , completing the lower deck frame repairs, and the MUDGUARDS. Also at this time I committed myself mentally to restoring the bus to 1937 condition, with high headlights, full swaging of body panels, and wide destination boxes. Up until now I hadn’t really thought about this, except to imagine that red and cream would look nice.